Spring never comes slowly and quietly in the northeast. One day its winter next day the temperatures soar and its suddenly spring. For gardeners and farmers it can be a real pain. One day you are going along fine thinking you are getting ready for spring. Next moment it IS spring and there is suddenly a huge amount to do.
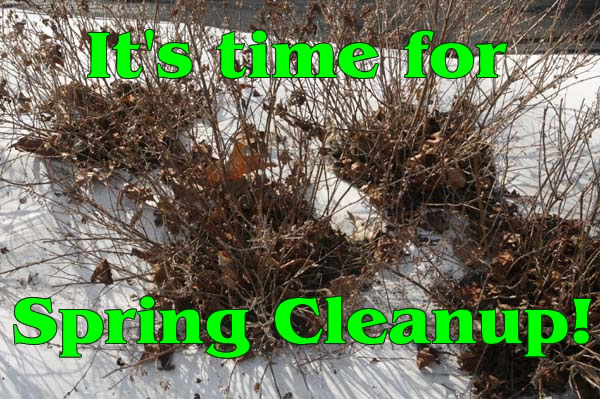
It’s time to get out there and clean up the garden or, for us, the fields.
First thing to do is pruning of any shrubs and fruit bushes before they come too much into bud. This includes all summer flowering shrubs like hydrangea, NOT azalea or spring flowering shrubs or you wont get any flowers. Pruning is a whole separate topic that I will write about at a later date. We have been pruning back our gooseberries, hardy kiwi vines and cutting out all the deadwood on our raspberries. Pruning back hydrangeas and the few other shrubs that were left over from the last owner and I can’t bear to dig out. At this time of the year prune back shrubs that will flower in summer. DO NOT prune ones that flower in the spring or you will be pruning off the flowers. These shrubs need to be pruned after they have flowered. If unsure on a particular plant checking for your specific plant online will usually tell you the best time to prune it.
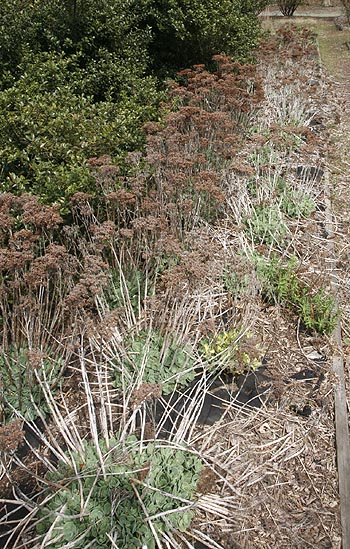
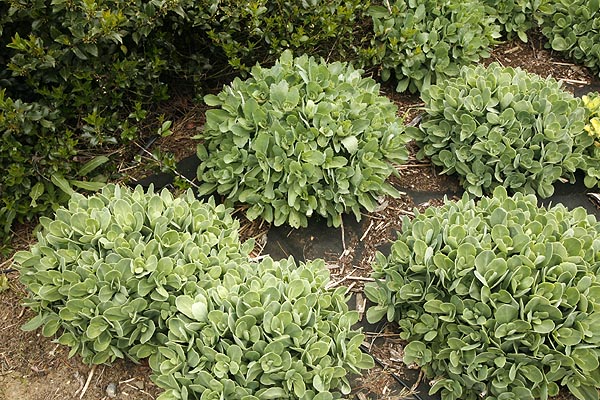
Ice plants (sedum spp.) before spring cleanup
The main project is to get all the perennial plants cut down to ground level before the new growth gets too strong. While it is true that a lot of this can be done in the fall there are many reasons why we don’t do this.
1. It gives overwintering beneficial insects somewhere to hang out. Many beneficials overwinter in hollow stems of dead perennials, if you cut all these down and take them away to the compost heap in the fall then you are destroying all those nice insects that are going to help your garden next spring. Others lay their overwintering eggs or egg sacks on such material and again removing them destroys any hope that your garden can protect itself from aphids and other pests in the coming year.
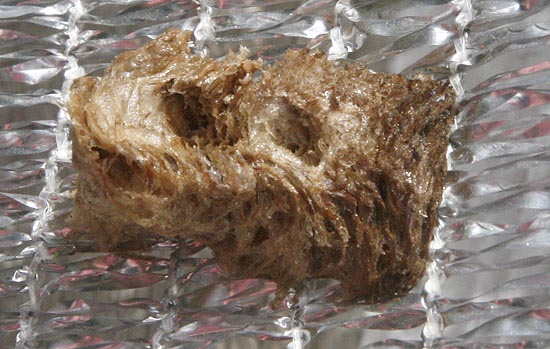
Every year I find many praying mantis egg sacs when I clean up the spring garden. I try to leave these stalks standing or if I accidentally cut one down I stick the stem into another patch of twigs to allow some protection until the babies hatch. Keep your eyes pealed for such egg cases before you clean them away.
Praying Mantis Egg case on silver shade cloth
2. For those plants with seeds remaining like Echinacea it gives the overwintering birds a food source for a while at least. Often they much prefer to use ‘locally grown’ food sources than bird feeders.
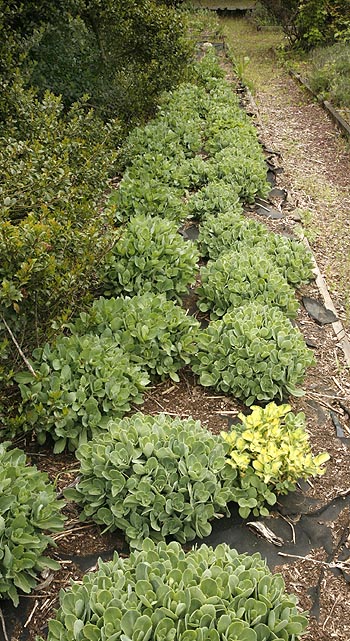
Ice plants one week after winter cleanup
3. It makes the garden look a lot nicer. Cutting everything down in the fall leaves an unpleasant barren landscape especially when its snowed. Leaving plants standing gives a lot of ‘winter interest’ to the garden rather than barren nothingness. It gives the garden a much warmer look even in the winter months.
4. Leaving material until the springtime often makes it much easier to clean up. While in fall the roots and stems of these plants still have some strength in them making it harder to either cut them down or to pull them from the ground. In spring all that resilience has gone and plants can either be pulled out easily or often snapped off at ground level with a hand rather than using secateurs or other cutting blades. I soon discovered that trying to remove okra stalks in fall was a very hard job and that they needed to be dug from the ground. If left until spring they can just be pulled out by hand. Anything that makes my job easier is a benefit as far as I am concerned. Why make more work for yourself.
If you have any ornamental grasses these need to be cut down to ground level to remove all the old dead grass stalks before the new shoots begin to form. If you are slightly late in cutting them down don’t worry, they are grasses after all. They may flower slightly later but that can also be an advantage, it means that the seeds don’t blow all over the yard and seed themselves. This is especially true of Chinese silvergrass which can turn into a menace rather than a delight.
Any leaves that remain from the winter or if you have pin oaks this is the time when they usually decide to shed their leaves, just when you have the garden all nice those leaves come down and make you do even more work! Leaves can easily get caught under low growing perennials such as lavender or hyssop and may need to be removed. Use a shrub rake if you can find one. Its like a leaf rake but thinner so you can get into tight spots. Sadly they don’t often sell them in big box stores or at least not good ones. I got this one in Rite Aid! I would have liked a longer handle but it works fine for what I need.
This year the challenge is getting everything cleaned up before the plants overtake us. The weather is so warm this spring that the plants are shooting up fast making it harder to remove some of the old plant material before the new stuff comes through.
Spring cleanup can be a very satisfying task. There is a great feeling of accomplishment when you can look at a newly cleaned area and see all the progress you have made. Its also great exercise and good fresh air. Just don’t get over enthusiastic. Overdoing it will cause muscle stiffness which you will regret the next day and may keep you from going out again to enjoy your garden more.
Happy Gardening!
Ice plants before cleanupIce plants one week after cleanup. Boy have they grown!
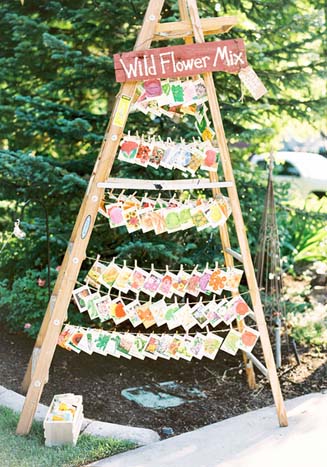
Spring is finally here, and if you are like most people now is when you realize its time to start your seeds. No its not too late even if your well organized friends had their seeds all sown and growing starting back in February there is still plenty of time for you to catch up. Starting seeds in early May is pretty common, and if you want to start them by direct sowing then this is the perfect time to buy your seeds. Depending on where you live early spring may still be on the horizon so don’t worry about being late. Seeds are just happy to grow, if you start them later than your friends they don’t care. As long as you look after them and they get to grow its all good with the seeds.
I always felt somewhat envious of those who were so organized that they has their seeds all sown by mid February. Before we bought our first farm I was always late getting the seeds in. In the end though I still got good plants, pretty flowers and good vegetables, maybe some flowered a little later than my organized friends but in the end it all seemed about the same. Now we have a farm I have to get seeds started early but that does not mean that all seeds get started at the right time. There are many reasons to start seeds later.
1. Life. It tends to go on around you keep you busy until suddenly, wow its spring, and we really need to get these seeds in now! This I suspect is the main reason most people don’t get their seeds in early, there is just too much else calling for attention.
2. Suddenly you realize you need more seeds that you sowed. It often happens. You think you only need 6 tomatoes then find you need 12 more seeds to sow.
3. Something was forgotten. Despite all the good planning, the lists, the checking somehow a species were totally overlooked and did not get seeded. Now there is a frantic rush to get the seeds sown. This happens more often than you would think even with professionals.
4. Some seeds come up really fast. Planting things like marigolds in February would be a problem. The things germinate very quickly and grow fast. Therefore such plants don’t need a lot of lead time for indoor planting. While other plants take a long time to germinate or are very slow to grow and need more time, these fast growers can be left and seeded much later.
5. The first seeds planted did not come up. This can happen for many reasons. It may be they were planted too deep, not watered properly, got a fungal disease or that the seed was not in good condition when it was purchased. See How Are Your Seeds Cared For Before You Get Them? I still have this problem at times since to get new plants and varieties to offer to you I need to buy from overseas sources then grow them to be organic before I can offer them to you. Not all the seeds that we get have been treated very well and they don’t always germinate. (which is a real pain if you have waited 6 months to get the darn things). This is why I always recommend that if you have quite a few seeds don’t plant them all at once. Then if something does go wrong you have a second chance to get it right.
6. Seeds came up then died for some reason, perhaps they were over watered, under watered did not get enough light, the cat sat on them (it happens more often than you think). Now you have to start those seeds all over again. Try to figure out why they died and not repeat the process. Put netting or something around the seed trays to stop the cat jumping on them. If you had seeds and got up one morning to find all that was left were little stalks, check under and around the tray for a slug. They come up in the night and mow down little seedlings.
6. Other reasons, could be anything the world if full of stuff to do and seeds are just one of them.
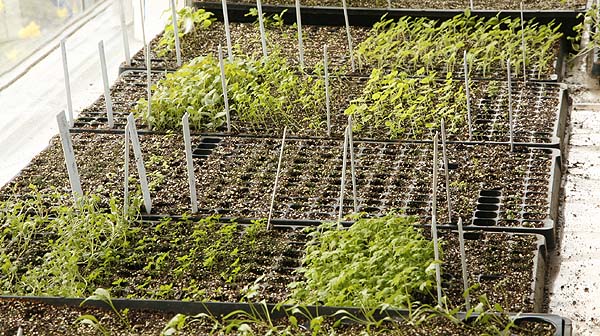
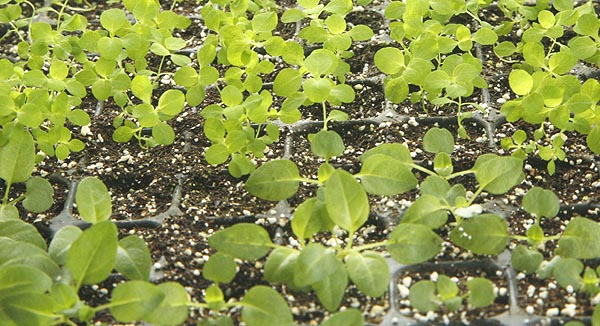
Cape Gooseberry seedlings
No matter what the reason there is always time to start more seeds. For some plants direct seeding is the best way to go anyway. Large seeds like beans, peas, okra, giant sunflowers are best direct sown as are things like Calendula and cilantro. Other plants need to be coddled a long time before they are put in the ground since they grow so slowly. No matter what time you start your seeds as long as you look after them then it’s the right time to start them. While its true that starting tomato seeds in August wont get you a crop starting them now will give you tomatoes later in the year than those who started early. If you eat a lot of some crops then starting seeds at different times makes sense anyway as it will space out your crop giving you more food or flowers for a longer period of time.
So don’t be deterred by those who started early and tell you its too late now. Its not. Seeding now is a perfect time. We are still seeding and so should you. Garden in your own time. Be creative and do your own thing.
Could your potting soil or pots be detrimental to your health?
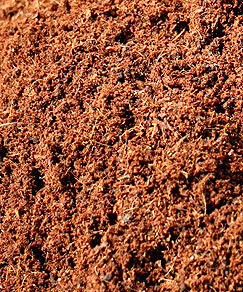
Quite a few potting soils today use Coconut Coir Fiber instead of sphagnum peat moss as the base for their mixes. It’s that fibery stuff that comes between the outer shell of the coconut and the inner bit that you eat. This material is trumpeted as better since it is a renewable resource from coconut trees and it is easily sterilizable. Once hydrated it can hold almost nine times its weight in water and then allow the rest of the water to drain away without getting waterlogged. It can be milled fine to be used in seed starting mixes or left with slightly longer fibers for use in potting mixes for larger plants.
Most gardeners are probably more familiar with Coconut Coir Fiber being used as hanging basket planters and small biodegradable pots. These have been gaining in popularity recently for two reasons: first they don’t break down quite as fast as peat pots making them easier for many people to handle, and again they are trumpeted as a renewable resource.
But sadly they are not renewable. Not any more.
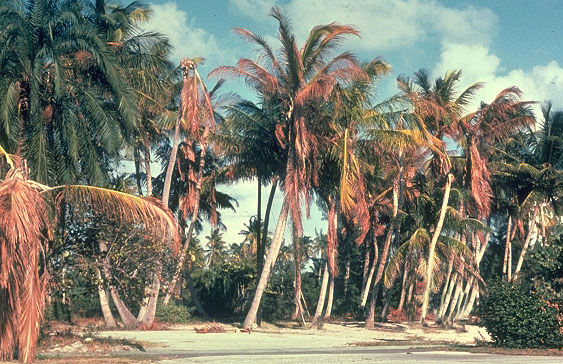
Maybe you have heard of it, maybe not. It’s called Coconut Lethal Yellowing Disease (LYD)and it’s killing the world’s coconut population. It has already decimated the trees in many countries. The hardest hit so far are those in North America, especially Mexico and the Caribbean. It has also hit Africa, parts of India and the Pacific Islands. Many of these small countries rely on the coconut industry, it is one of the staples of their economy. In some places over 90% of the native palms have been exterminated by this disease. [1,2]
The problem is there is no cure. There are just two choices.
1. Cut down and burn any infected trees to stop the spread of the disease.
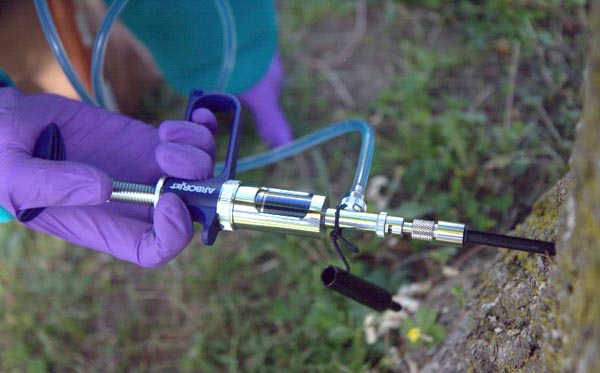
2. Treat the trees with antibiotics. Mostly oxytetracycline (OTC) is used. The antibiotic is injected into the trunk of the tree. This has to be done every 4 months for the life of the tree. It won’t cure it but it will keep the disease at bay so that the tree will live. [3,4,5]
This second method is being used extensively in resort areas. Most areas that rely on tourists want to keep their palm trees. After all that’s what the tropics are about. How can you have an exotic tropical resort without the palm trees? No one wants to be around a bunch of ugly dead tree stumps.
Areas like Florida also use OTC on their ornamental trees. Over the last 40 years Florida has lost a huge number of palms especially coconuts to LYD so using antibiotics to keep the ambiance in places like the Florida keys is essential. They also put out leaflets warning everyone NOT to eat the fruits (coconuts) of the treated trees [6]. A fairly high level of antibiotics is needed to keep the trees ‘healthy’ a lot of that is going to get concentrated into the fruit. You really don’t want to eat that.
Tree Injection. Photo David Cappaert, Bugwood.org
WHO IS USING ANTIBIOTICS?
The crisis of the coconut is massive, but the demand for coconut products is still rising. With the advent of coconut water in the last few years heralded as the ‘latest super food’ demand is increasing not decreasing. While research into the problem continues trees are being fed antibiotics. In countries where the coconut is the main agricultural staple providing most of their export products financial ruin may occur if all the trees die and their crops are decimated. Whether these plantations use antibiotics to stave the disease off their trees is unknown, it’s unlikely they are going to advertise the fact to anyone. Perhaps the fruits are not being incorporated into our food chain but what about the fiber? This is not a food so it would not come under the same rules. There is nothing to stop anyone grinding up the fiber from treated trees and selling it as potting soil or using it for plant starter pots.
Is this safe?
Digging into the research on antibiotics and OTC specifically gets a little concerning. The stuff is used quite a bit in veterinary medicine so there is research about it’s stability which is fairly high. There is even research about it’s stability which is fairly high. There is not a lot of research about how stable it is in soil and how long it will last but piecing together lots of different studies it appears that:
1. It’s fairly stable in soil and can last around 10-15 days on it’s own in cool soil..[7]
2. It’s not affected by heat, it’s even more stable. Can take being boiled for 30 minutes before it starts to break down at any point. [8]
3. Much more stable in the dark.
4. Breaks down in more alkaline conditions but in ph neutral or slightly acidic conditions it can last over 60 days or more. [9]
5. Breaks down in sunlight much faster. [10]
What does this mean for your starter pots.
Since OTC breaks down in sunlight its probably fine for hanging basket liners where they are exposed to the sun a lot. If using coconut fiber starter pots make sure that the pots have a lot of sun exposure from the moment that they are used. Do not crowd them together or put them in an area where they don’t get a lot of light.
What about the potting mix?
Its hard to determine exactly how long the antibiotics are going to stay around in the soil. It could be a few days or it could be up to 60 days. The research that does exist on antibiotics and OTC in the soil all states that there is a reduction in soil biology and activity. Basically it kills off all the good stuff in the soil that you really need to make your plant healthy. The only way that they were able to improve the soil biology again was to add manure which basically reintroduced a lot of the microflora that they had just killed off.
If these substances are as stable as some research suggests then these substances are going to be transferred to your garden when you transplant the seedling. This means it could spread the problem to a larger area of your soil. The intention is to build and create a good soil microflora to keep your plants healthy and strong. Killing all this off with antibiotics achieves the complete opposite of what we want. [11 – 14]
Is OTC taken up by the plants?
There is little to no research being conducted on the uptake of antibiotics by plants. What little there is has reported that there was a change in the carbon source utilization and content. [15] Others reported that soil respiration was vastly decreased, meaning basically everything in the soil is dead. Others reported that there was a decrease in the growth of the tested plants, most likely due to the death of any soil microbes. [16]
There is no doubt that if the antibiotics survive in the soil that the plants will come into contact with them. How they are treated by the plant and if they are taken up is unknown. [17, 18]
So Is it safe for me and my family?
The simple answer is no one knows. For safety refrain from growing anything that you intend to eat in soil that may have antibiotics included. Flowers and other plants that are not intended for consumption are most likely fine but bear in mind that you may be destroying your soil biology when planting this material in your garden.
[5] Lethal yellowing of palm
Harrison, N.A. and M.L. Elliott. 2008. Lethal Yellowing of Palms. The Plant Health Instructor. DOI: 10.1094/PHI-I-2008-0714-01
[16] Association Efficiency of Three Ionic Forms of Oxytetracycline to Cationic and Anionic Oil-In-Water Nanoemulsions Analyzed by Diafiltration
Authors Sandra L. Orellana,Cesar Torres-Gallegos,Rodrigo Araya-Hermosilla,Felipe Oyarzun-Ampuero,Ignacio Moreno-Villoslada
Journal of Pharmaceutical Sciences Volume 104, Issue 3, pages 1141–1152, March 2015
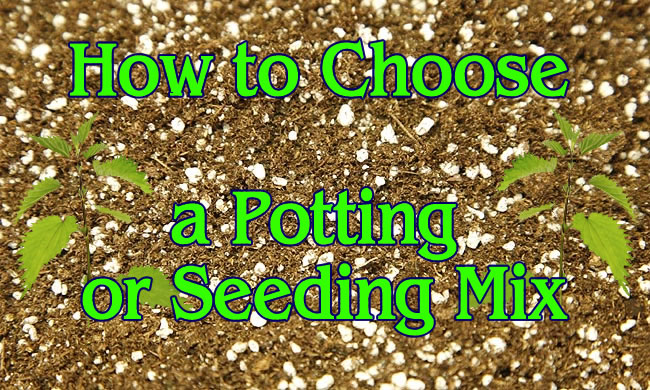
There are lots of products on the market today made to start your seeds in. There are even more potting mixes to move you little plants into. Some are great, some are good and some not so much. How do you decide which is the best for you?
First we need to understand what a little seed needs to grow best. 1. Particle size.
Small particles so that little seed does not have to push through large clumps to get its shoot up to the surface and its roots in the mix.
Think how you feel when you wake up in the morning. Warm sleepy don’t want to get out of bed. Most people feel that way, but you push the covers back and swing yourself out of bed. That’s what it should be like.
Now imagine if you woke up with a few boulders and giant lumps of stuff sitting on your chest. First you need to push these out of the way before you can even think of getting the covers off and getting out of bed. Think you might be unhappy about that. Think you are going to be late to work that day? You bet.
This is how a little seed would feel. In a fine light potting mix it can stretch, yawn, the push out its little roots and raise its shoot to the light above no problem.
If the mix is heavy and has large pieces in it, that seed has to fight to get around them. Its harder for it to put out roots is has to find a path between the ‘boulders’ to push the roots. It has to work hard to get that shoot up to the surface. Its going to take a lot longer to grow in any way. If the boulders are too big and heavy it may be far to much for the little seed and it may die in the attempt.
2. Water.
Obviously seeds and plants need water to grow. Therefore its important that the starting mix holds water well so there is plenty available for the little seeds roots to take up without being waterlogged which can lead to fungal growth that can kill little roots very fast.
3. Air
Roots need air too, they breath just as much as the shoots do. This is why many plants don’t do well in waterlogged or very compacted soil. There is no air and the roots cant breath. Good soil and seeding mixes have lots of air spaces in them to keep air around for the roots to breath. Therefore its very important that the seeding mix is not to heavy so it collapses the tiny air pockets or hold to much water and drown the roots.
SO WHAT IS POTTING OR SEEDING MIX MADE OF?
Most seeding mixes are made of very similar materials. Its how they are combined and in what quantities that is most important.
1. Peat Moss.
peat moss
For the most part I am against using peat moss because its not a renewable resource. The one exception is for seeding mixes where it is certainly the best option to use. It is certainly a wonderful organic compound its light and it absorbs a great deal of water. It is the basis for almost all seeding starter mixes. The best ones use a very finely milled peat moss which makes it perfect for little seeds. Ones that use a harsher milled mix might be OK but often the particles are too large making it harder for small seeds to grow quickly and easily. Finely milled mixes are also easier to use in small individual cell seeding trays and they hold water well.
2. Perlite.
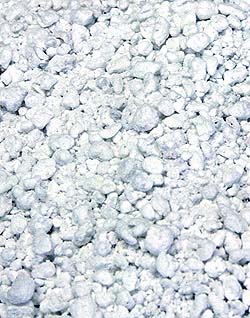
perlite
This is that white stuff you see in almost all mixes. Its actually a natural glass, another non renewable resource. Its formed from natural glass and heat, so it’s the popcorn of glass. In the same way that popcorn is much lighter and fluffier than the corn kernel kind of like popped glass just like popcorn. This means that it has a really big surface area with lots of holes for air to get trapped in for nutrients to be held in until the plant needs it. It helps to retain water so that the mix does not dry out as fast. In its natural state it is sterile so will not bring any diseases to new seedlings. Perlite is used a lot in horticulture and is a major component of a almost all seeding mixes. This lightweight bright white rock is often mistaken by consumers for polystyrene, and some cheap potting mixes in fact do use polystyrene instead of Perlite. This is a cheap trick as polystyrene has none of the good properties of perlite its just there to bulk out the material and fool the consumer.
The white color of perlite also helps to reflect light back off the seeding mix, this helps to keep the soil temperature down and reflect light back onto the growing seedlings.
The major disadvantage of perlite is that it is very light, so it can float to the surface if there is too much water or rain. If mixed with soil after a heavy rainstorm perlite often rises to the surface and floats away in large collections. This can be unsightly in the garden and is obviously no use to the soil at all. Use perlite in seeding mixes but keep it out of the garden mixes.
Perlite comes in many sizes from extra coarse to very fine. Good seeding mixes use a finely milled perlite to give a good fine mix with the milled peat moss and other ingredients. Don’t use a mix with a course perlite for starting seedlings to little seeds there are like giant lightweight boulders.
3. Vermiculite.
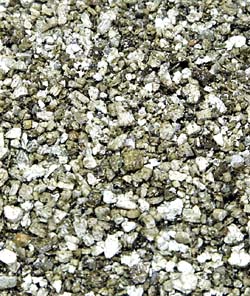
vermiculite medium
This is also a expanded mineral. Vermiculite is an aluminum-iron-magnesium silicate that forms shiny sheets rather like mica with which it is often confused. It is shiny gold brown in color. When vermiculite is heated the sheets expand or ‘exfoliate’ to form elongated concertina like particles which are lightweight, incombustible, compressible, highly absorbent, and non-reactive. The particles look like shiny fluffy puff pastry and in this state vermiculite can hold up to 4 times its volume in water. The really nice thing is that they are very attractive to cations and have a very high exchange capacity because of the surface chemistry. For your plant this means it is able to have access to a range of minerals especially calcium, magnesium and potassium as well as ammonium which are essential for good healthy growth. Instead of these minerals being washed out of the soil mix the vermiculite attracts them and holds them until the plant roots can access them.
Both perlite and vermiculite are pH neutral (around 7.0) and they are sterile making them excellent choices for potting mixes.
Many potting mixes have just these three things in them and mixed in the right quantities this is pretty ideal. Most plants do very well starting in such a mix.
OTHER MIX INGREDIENTS
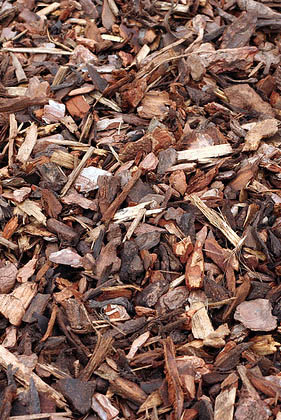
Shredded bark or shredded wood.
Some mixes contain shredded bark or bark mulch. This can be fine depending on a few things. 1. Preferably it’s not pine bark. This usually contains too much acid and can throw off the pH of the soil mix. Most plants don’t like a high pH so its good to get something that is neutral. If you do use a mulch contain pine bark ensure that is has been pH balanced to about 7. If not then pass it by.
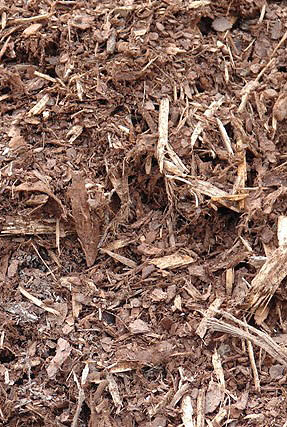
more finely shredded bark, is more suitable for potting mixes
2. Its shredded quite fine. If it has large bits and twigs in it then its not going to be too good for the plants. When I think of large here I mean something about ½” ( cm) long or more. If its over an inch then its definitely a big problem. Large pieces are just like giant boulders to a little plant root. It means they have to struggle around them and cant create the root structure that they really need. The large bark segments don’t offer that much aeration of the soil either. Perlite is a much better option. If pieces are too large then they tend to float when water is added and rise to the surface of the mix. This creates more of a barrier for the little plant to fight through when its trying to grow.
3. It’s been sterilized before the mix was made up. Wood more so than bark has lots of hole in it (like lots of little drinking straws) so there is plenty of space for water retention but those holes have been part of a tree that could have been in contact with millions of different bacterial, fungi and other possible pests. You don’t want to bring that into your mixes when starting little plants. Good potting mixes heat sterilize their ingredients before making up the mix. Check the bag to make sure it’s a sterile mix before buying it.
4. The material is well rotted down. If the bark or wood chips are not rotted down first then when the bacterial and fungi arrive (and the will arrive no matter where you put your mix) they are going to attack the chips for food. To do this they need food too and this will suck up any Nitrogen that is in the mix for the bacteria to use and take it away from the little growing plants. A well rotted mix is essential for good seedling growing.
Coconut Coir Fiber This the fiber found between the husk and the fruit of the coconut. Most gardeners are familiar with it for use in hanging basket liners or biodegradable pots. However more recently it is being ground up into much finer mulch and used to replace peat moss in potting mixes.
These fibers are a very good material for several reasons.
They hold about nine times their weight in water so they will keep the mixes nice and moist for longer periods. Once saturated the rest of the water drains away so the mix is not waterlogged. The only downside is getting the fibers fully saturated in the first place can take some time so the mix needs to be well watered before you put any seeds in it. Most good potting mixes come slightly moist to help alleviate this problem.
The major problem is that if it does dry out then it takes a long time to rehydrate it, by which time your poor little plant will be dead. If watering is done on a consistent basis this should not be a problem. However if you intend to combine it with your garden soil later in the year be aware that it drying out could be detrimental to your soil.
Grades or coconut Coir Fiber.
Just like peat moss coir fiber comes in different grades, course and fine. For starting seeds the fine grade is essential since it is milled so that the fibers are small and easy for little seeds to deal with. The coarse grade has much longer fibers and should only be used in potting on mixes.
Concerns about safely and sustainability coconut Coir Fiber.
While at one time using coconut products would have been considered a good renewable resource this may no longer be the case. With Lethal Yellowing Disease decimating and killing off so many coconut trees around the world soon it may be far more difficult to get any coconut products. Many countries have seen devastating losses of up to 85% of their coconut palms. There is no cure for the disease and trails to find resistant varieties are slow due to the slow growing nature of palms. However most trials have not found a good resistant variety so far just some that succumb more slowly. The only treatment for the disease is to inject the trees with antibiotics. After such treatment the coconuts are no longer fit to be eaten and any fibers that are produced from these fruits should not be used in potting mixes that will be used for food plants as the antibiotics could easily be transferred to the new plants.
The upshot is that using coconut fiber is now becoming suspect since there is no way of knowing if your fiber has been treated with antibiotics. I don’t like to recommend mixes using this fiber.
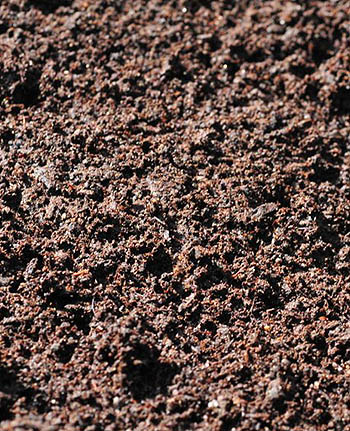
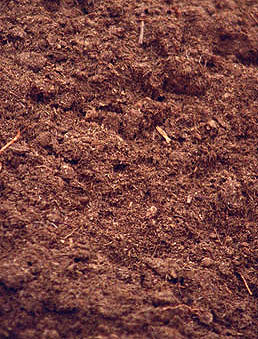
well rotted and screened compost
Compost.
The word compost embraces many different things. For simplicity here I will describe it as ‘any organic material that has been broken down into fine rich particles.’ This material could come from other plants, wood chips, weeds, straw, cow manure, horse manure almost any plant source or plant grazing animal waste.
No matter what material is used before it is incorporated into soil and especially into potting mixes there are a few basic rules that should apply.
1. It should be very well broken down. There should not be any large particles at all. The material should look like rich black soil. 2. It is STERILIZED! Before adding any compost to a potting mix it must be sterilized. Compost is made by bacteria, fungi and other organisms feeding on the organic material. This is basically their waste product. However in its ‘raw’ state it’s still going to be full of all those organisms. This is good, if you want it in the garden. If you want to start seeds or little plants in it then it’s not. You can have all kinds of problems.
The most common ones would be.
1. Bugs. Little flies, maggots or any other unpleasant pests. They will have laid their eggs in the compost, mostly because it’s rich and it’s warm. Then later they hatch all over your seedlings. Not a good start to life. This is especially a pain if your seeds are in the house.
2. Fungi and bacteria. With improperly or unsterilized mixes you can get ‘mushrooms’ growing in your seeding mix, or you can get a fine white film growing over the top of the soil as the fungi feeds on the material that was only half sterilized. In either case its not good new for you little seedling.
It’s not always easy to tell if your mix has been sterilized or not. I have certainly had many mixes that are available in big box stores come in with little round egg case balls festooning the mix. Sadly ‘miracle grow’ mix does seem to be one of the worst culprits for this. In most cases the eggs have been killed but to my mind they should never have been there in the first place!
For the best growing results for small seeds and plants we suggest you don’t pick one with compost in it. Mostly because you can never be sure that it has been treated property and you will not be importing more problems into your home. Leave the compost for outside and incorporation into the soil not in pots.
WHAT TO LOOK OUT FOR. Polystyrene balls.
Some very cheap mixes use little polystyrene balls in their mix instead of perlite. This is a terrible idea. They think you wont notice the difference since they are both light and white in color. The problem is that polystyrene does nothing for the plants it just bulks out the mix for the manufacturer so you think you are getting more for your money while all you are doing is lining their pockets with case. The polystyrene does not have the open weave of the perlite it does not hold water or do anything good at all. Even worse it floats to the surface when you water it. Look closely at the mix before you buy. Never buy one with polystyrene.
Egg cases, little translucent balls or other suspect material.
Not all egg cases are visible, the worst ones with tiny flies and fungus gnats are never visible. Sometimes you will find mixes with small translucent balls about 1/8” across. These too are egg sacs. If you see anything suspect don’t buy the mix, even if its on sale. Its not worth the hassle you will have later.
THE BEST SEED STARTING MIXES.
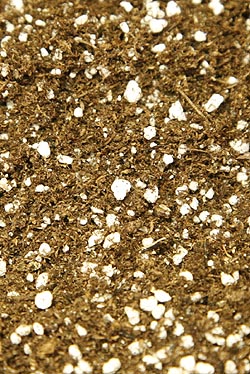
Finely milled seeding mix
The best ones contain the above combination (peat moss, perlite and vermiculite) but milled very fine. This ensures that the seedlings don’t have any huge boulders to try and grow around but there is good aeration of the media with lots of space for water retention. Starting with perlite and vermiculite will get a fairly sterile mix and its very uncommon for peat moss not to be also. This is essential for seeding. You don’t want weed seeds, fungi, bacteria or other things in it to attack the little seedlings as they are growing. SO don’t reuse seeding mix use it once out of the bag then any failed seeds use it somewhere else or mix it in the garden. Never reuse it for seedlings. Its OK for potting on IF it is mixed with other things too but not alone.
Some seeding mixes also contain some plant food. This can be considered desirable but its just as easy to feed the seeds yourself once they start to grow. The amounts in the mix wont last long on the seedlings anyway so you will still have to feed them. Its not worth paying much extra for food in the mix when you need to feed them anyway.
Potting mixes.
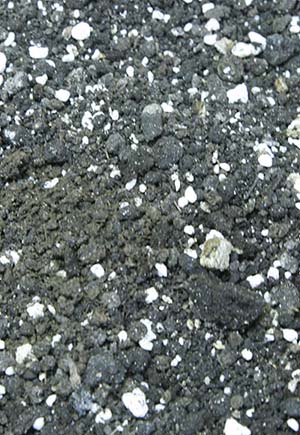
potting mix. This one is made of perlite, vermiuculite and mushroom compost
These can contain other things but the staples of perlite, vermiculite and peat moss. A good potting mix will often have a nice compost incorporated into it. The mix should still be fairly fine. If you can see larger pieces of wood chips pass it buy. Read the bag see if it states that its sterile.
LOOK AT THE MIX BEFORE YOU BUY IT.
Yes I know the bags are sealed but there is usually one that is not. If not stick your finger in the end and pull a little out anyway. Its vitally important that you know what you are buying. If you don’t look you may end up carrying home a lot of polystyrene, bugs or wood chips. Always inspect the mix before you buy it and make sure you are satisfied with the composition. If possible buy your mixes from a good garden center or commercial store. NOT from a big box store. These places often carry cheaper materials but they are cheaper because they have not been treated properly. YOU are investing effort into starting your seeds make sure its not wasted by buying an inferior mix.
Once you find a brand you like, stick with it. You will be happier that way.
Give your seeds and little plants the best start they can have, they will reward you with better plants.
Unusually early plant growth is susceptible to changes in the weather.
It’s been an usual winter, the temperatures have been high across quite a bit of the country. Here in the northeast its been in the high 60’s low 70’s for almost a week.
The plants think its spring!
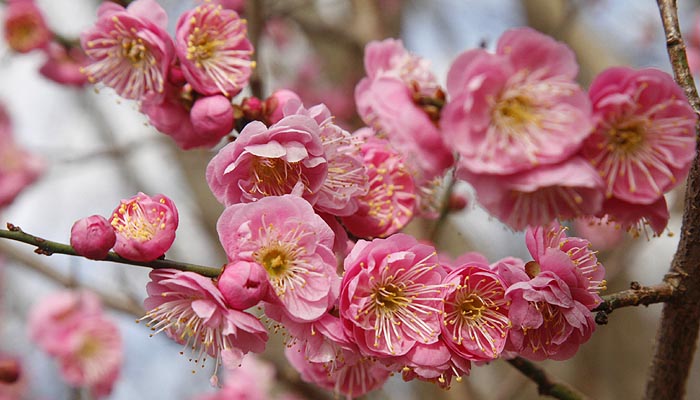
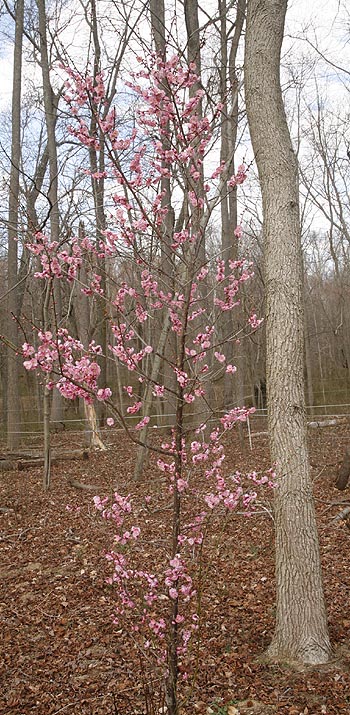
Warm weather brought the lovely Japanese Apricot tree into bloom way to early.
Lots of plants are starting to come out of their winter hibernation and starting to show growth. Others are even flowering. For us our beautiful Japanese Apricots are in full bloom. If you have never seen one of these fairly rare trees you are missing out. Their blooms are wonderful. Trouble is this year they think its spring and its not. Blooming in the sunshine of 70° weather is one thing but then the temperatures are going to drop down below freezing overnight. You may have the same problem.
What to do about it?
Low Ground plants. Close to the ground and showing shoots early can be covered in mulch to keep them warm during the cold temperatures. You may want to move the mulch back again if the temperatures rise again or it will force them higher sooner to get around it. Then you will need more mulch for the next cold snap, it’s a vicious cycle.
Medium sized plants that are flowering or budding.
If they are small enough cover them with plastic grocery bags. I had to do this one year when we had a late cold snap and all my impatiens were in. The garden was festooned with plastic bags, but hey the plants survived. You can do the same, just cover the plant with the bag weigh it down with a few stones and presto a mini greenhouse. Remove the bags when the temperatures rise.
Larger plants can be treated the same way if you have a bag that is big enough. Use plastic garbage bags. Its best to use white or light colored ones DON’T use black ones unless you get the bag off early the next morning. Black will heat up fast and can fry the plants inside if they are not removed. Same will go for transparent ones if they are left in full sunshine.
Trees and other large plants.
Well if it’s a big tree there is nothing you can do. Our maple trees are flowering but they just have to take their chances there is nothing to do for a big tree.
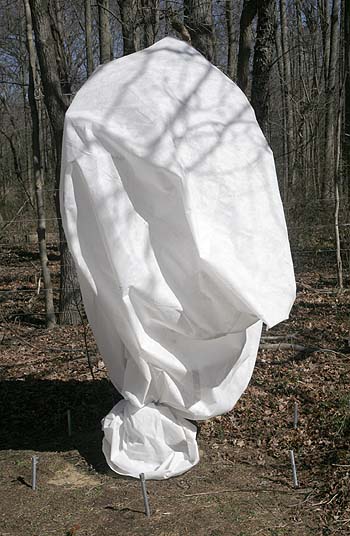
Smaller trees can be covered in fabric. You can buy row covering fabric sometimes called floating row cover. Don’t get the really thin stuff it tears easily and is a waste of money. Get something a little tougher and either wrap the tree or if you have a sewing machine turn it into a large bag that can be dropped over the tree and tied around the trunk. That’s what we did for our apricots. It was a two man job to get the things sown as there was so much fabric it keep trying to pull out of the sowing machine, but with one person holding and the other sewing it was pretty easy. If you are a sewer and intend to do this, use clothes pegs to hold the fabric together not sewing pins, it’s a lot easier to work with.
Japanese Apricot tree covered in bag made of plant protection fabric
Floating row fabric is fairly inexpensive but you need to buy it in advance so you are ready to use it. Greenhouse megastore has a nice selection. You may need to buy more than you need as it comes in fixed lengths but its fairly inexpensive. Once you have some its easy to get out and use every year and you will be happy you did, its got all kinds of uses to keep the plants warmer in cold snaps or extend the season a little in the fall. Its always good to have some on hand. We buy it by the roll so we have enough to do any job on the farm in a hurry.
If you don’t have any row cover any kind of fairly lightweight fabric will do. Old sheets, curtains and such like can be put to use. Its never a good idea to throw out old sheets they can be easily pressed into service as plant covers. We used to do this all the time before we bought real row cover. If you have nothing on hand see if there is an inexpensive fabric store near you. Some Wal-Mart’s still have cheap fabric available. So it might have transformers or ninja turtles on it the plants don’t care. Keep the fabric around it will last for years and keep your plants warm and cozy during cold snaps. Fabric needs to be tightly woven if you can see through it or it has an open weave then it wont do the job. If possible pick a lighter color but any color will do. If you buy a bolt of it you can just wrap it around the tree to cover it all up. I used fabric and old sheets for years before we bought row cover its more expensive to buy fabric but if you need it in a hurry it’s the best option. Now I have too much that needs protection to use fabric and buy row cover by the roll.
If it gets REALLY cold.
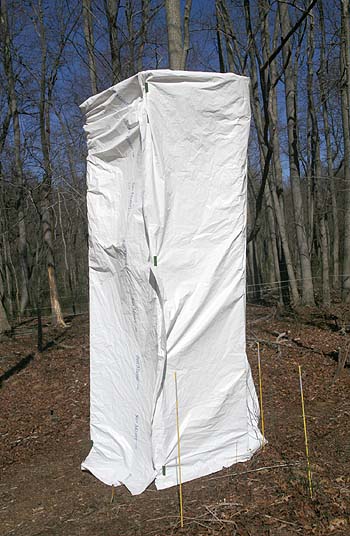
Japanese Apricot tree now wrapped in white plastic to protect it from the late snowfalls and frigid temperatures.
Most of the time once plants have begun to flower the temperatures just go down a little below freezing. However if the temperatures go down a LOT then the fabric might not be enough to keep those precious plants warm. Then you certainly need plastic for the job. If you live in an area where there are commercial nurseries you will notice that their hoop houses are all covered in white plastic for the winter months. This is to keep their plant pots from freezing. This is the kind of thing you need to do for your plants. The same methods described above can be used to cover plants in plastic rather than fabric.
You need white or light colored plastic to let the light in. Not black the poor plant gets no light, and not clear. Putting the plant in a transparent plastic bag will get it really hot in the sunshine and encourage it to grow and bloom even more. Then it will be really out of sync with the ‘real’ world temperatures and may go into shock if you take the bag off at the wrong time.
We use the white plastic left over from our winter hoop house to cover individual trees. This was our first year doing this and our design needs a little more work but it’s a good start. Most years hopefully we wont get such massive swings in temperature as to need to do this.
If you are in a hurry.
Head to home depot and pick up some of their thin white plastic drop cloths. These are ideal for short term plastic fabric. Ideally you need something a little thicker but they will work well for a while. The major problem is that they are very thin so if the wind blows you could get holes poked in them by plant twigs and branches.
If you are covering bushes or small trees make sure that you either take the coverings off when the sun comes out and the temperatures rise or at least open the bags up so that the air can get in and the plant does not get too hot. While white plastic will keep plants a lot cooler than transparent it can still get hot under there when the full sun is hitting it. Remove the covering when temperatures rise to a reasonable night time level, but be ready to put them back on again if the temperatures fall again.
With a little care plants can be coddled through this strange weather and come out in spring with no harm done.
How to Protect your plant from late winter cold snaps.
Do you know where your packet of seeds has been? Do you know how they have been treated before you buy them? Are you sure they were treated well so that they will be as viable as they possibly can be when you plant them? If you can’t answer these questions then perhaps it’s not your fault that your seeds did not germinate. It could well be that your seeds were dead when you got them.
I am sure that at one time or another you have bought a packet of seeds, planted them, waited and nothing has happened. For many, they consider that they did something wrong, sometimes you do. Some seeds are finicky about their growing conditions. If they need light to germinate and you covered them, then they wont grow. Its always important to follow the growing instructions for seeds to have success. Some seeds are also very particular about temperature, light, moisture and other factors, but a great many for the most part will grow if you stick them in the ground and water them correctly. That is if you have viable seed to begin with. If your seeds were not treated well before you buy them then they most likely wont grow.
Most seeds are fairly tough. They have a protective coating that helps to keep them moist inside and guard them from the rigors of the world. Most have to endure winters outside and hope they have fallen a an area that is favorable for them to grow the following year. However tough does not mean invulnerable. Treating seeds with care and storing them in the best way to keep them viable for the greatest length of time will help ensure that they will grow into healthy plants. Indeed that they will grow at all.
First lets look at the life of a seed in the wild.
It grows on the mother plant, it ripens and then gets dispersed in some manner. It then falls to the ground and waits. In most cases this means waiting though the cold winter months for spring and moisture to arrive so it can hopefully sprout. The seed lays dormant while it is cold. Therefore storing seeds in a cool to cold environment will keep them in that dormant stage for long periods of time. Indeed this is how all seeds are stored in seed banks the Svalbard Global Seed Vault is located high above the arctic circle. Scientists have long known that keeping seeds cold, dark and low humidity will keep them viable for long periods of time. So obviously keeping them under other conditions is not going to be good for their viability.
So where has your seed packet been?
Now let us consider that packet of seeds you might buy in the store. This could be a big box store, hardware store or garden center.
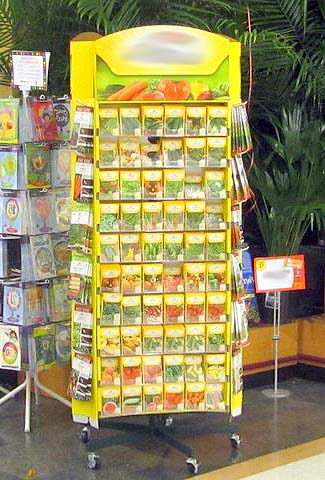
First where is it when you see it? On a rack with lots of other seed packets in a nice warm heated store. It’s stuck up in the air with lots of warm air circulating around it. Is this a good environment for seeds? NO.
Seed rack in store. In bright light, next to card racks and backed by plants. Humidity will be high near the plants and bright light and heat is not ideal for seed viability.
How long has it been on that rack?
If you are fast you might be able to get to the seeds when they first arrive on the rack. Then they won’t have been out in the warm store for that long. However most people come to get their seeds long after they have been sitting on that rack. How long have they been there, weeks months? All that time in a warm store.
Where is the rack located?
Good stores will put them far inside the store where the temperatures are fairly even, but I have seen many stores put them in windows where the sun beats down on them during the day heating up the seeds, or in the greenhouse section of the garden center. Is that seed going to be viable when you do plant it? Unless it’s very tough, probably not.
How did your seed packet get to the rack in the first place?
Most likely it came in a truck. Packed in a box. That might be fine but it depends on where that truck has been. Has it been moving through sunny hot climates before it got to your store? It’s possible that box could have been left on the loading dock in the sun for hours, maybe longer getting hotter and hotter. Seeds don’t like that.
This rack is outdoors in bright sunshine! This is just death to seeds!
How far has it travelled to get to your local store. Or even your online store?
Don’t assume that the seeds you buy are grown here. Most are not. Most seed companies won’t tell you where their seeds come from and their websites often talk about their garden centers or such like but their seeds are not grown here. A large proportion of seeds come from Holland, Germany, Poland and China. Yes, I was surprised too. Often the seeds are travelling very long distances across oceans before they reach the wholesaler, who may then repackage them into those colorful packets that you buy in the stores. In some instances it’s not even clear what year the seeds were grown in before they reach you.
How was the seed processed and stored to begin with?
A large proportion of seed companies don’t store their seeds in cold conditions. Having been to many different seed conferences and talked to other seed growers I am always shocked to find how they store their seeds. Many small companies just keep them in boxes in their house, others have a commerical building but because they are using it all the time it’s heated. A lot of times these are metal buildings and they get darn hot in the summer months. This might be fine if you can sell your seed on very fast to your buyers but it’s never a good place to keep seed for even a few days.
Is your seed dated?
Surprisingly most seed packets don’t have any kind of date on them. They don’t even tell you what year the seed you bought was grown in. This means that you could be buying packets that are years old. Just where has that seed packet been stored and for how long? One of the reasons that some seed companies do this is because the seed may be several years old if it has traveled the world before it got to your seed packet. Another is so they can sell on last years stock and not take a loss on seeds that were not so popular. That might be OK to do IF the seeds were stored in the right conditions in the meantime, but most of the time they are not, just stuck in some warehouse somewhere that is usually not climate controlled to keep it cool in the summer.
What Floral Encounters does.
We grow all our own seeds. Yes, we do buy seed to grow, it’s the only way we can get new and different plants to grow. Mostly these won’t be organic when we get them so we need to grow them on at least two years before they are producing organic seeds for us. We have to buy seed from overseas because mostly they are not produced here. Even those times I bought from a ‘local’ dealer I found that the seeds were actually coming from overseas and being sold on by those companies. Surprisingly a large number of seed companies do this.
Once our plants are established we then collect our seed from the field and store it in a cool seed storage barn. Ours is located under dense tree cover so it stays as cool as possible throughout the year. Once the seeds material arrives it may be laid out on racks to fully dry or if already dry stored in bins until we have the time to process it. We then do as much bulk processing as possible. This removes as much large material as we can, then we store the remaining material in a cooler atmosphere.
As soon as we have time the seed will then be sifted to remove as much material as possible from the seed. As we state in are FAQ it takes an enormous amount of effort to remove all the material from the seeds unless many thousands of dollars are spent on seed cleaning machines which we cant yet afford on our little farm.
We remove all the material we can then our seed is stored in bulk in refrigeration units that are designed to keep a constant humidity and temperature. All our seeds remain there until they are sold directly to you.
We package our seeds for each order. This ensures that all the seeds you buy have been stored at the best possible temperature for the longest possible time thus keeping the seeds in the best possible condition before they are sent to you.
We also date our seeds with the year that they were harvested so you know how old the seed you are getting is. In almost all cases we use seed grown in year before so 2016 seed would be used in 2017. Occasionally we use older seed if we did not grow that seed in a particular year or if the harvest failed, which does happen on occasion but its very rare with such a diverse farm. Dating seed ensures that you know exactly how fresh the seed you are getting is and when it was grown.
When shipping our seeds we take all our orders directly to the post office and post them inside the building. This ensures that they stay as cool as possible for as long as we can manage. We don’t place them in hot mail boxes or give them to open air mail carriers. This is especially important during hotter summer months. In this way the seeds we offer are as fresh and viable as they can possibly be.
So our seeds are shipped directly to you from our cooled storage giving them the least possible time in less than idea conditions. So if you buy our seeds you know exactly where they have been and how they were treated until they were sent to you.
We always recommend that you place your seeds in the refrigerator as soon as they arrive and that you keep them their until planting. If you don’t use the whole packet then put the rest back. Use them again next year, they should be fine.
1. You get a jump on winter. Instead of waiting until the weather is warm enough to sow our seeds outside we start them during the winter months inside so they are large and hopefully health by time its warm enough to plant them out. So we get larger plants sooner, our gardens have flowers faster and our vegetables are available much earlier.
2. Growing inside in trays gives you complete control over the conditions in which the seeds germinate. Sown outside the seeds have to take their chances that the conditions are right. Inside you have a much higher rate of success and thus more plants than hoping nature will give you what you want. So you get more plants for your money.
3. Many seedlings are small and grow slowly at first. This is far more common with perennial plants than annuals so starting early and giving the plants a good start nursing them to a reasonable size before putting them into the ground gives them a much better chance at survival, it also ensures that they don’t have to complete with a lot of weeds in that first important stage of their lives.
4. You get so much more for your money. A packet of seeds is not expensive it may seem like a lot when you look at those little seeds in the packet, but each one of those little seeds is a potential plant. That ends up as a LOT of plants! A packet of seeds may cost perhaps $2.00 – $4.00 which will give you anywhere from 30 to 200 seeds. A pack of plants in the garden center could cost the same amount of money but you only get 2-6 plants at the most.
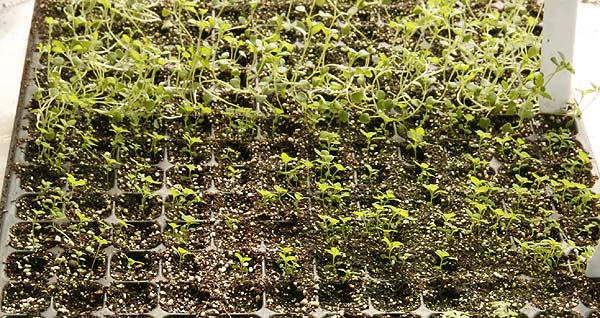
two species of seedlings growing in cell trays
5. Beats out the weeds in one of two ways. If you sow seeds early inside then the plants you grow don’t have to compete with weeds as they would if they were direct sown. This gives them a wonderful advantage. Annual flower plants can be planted closer together to form a solid mass of plant cover for the summer months. This ensures that there is much less weeding since the weed seeds don’t have enough light to germinate. It’s a win win.
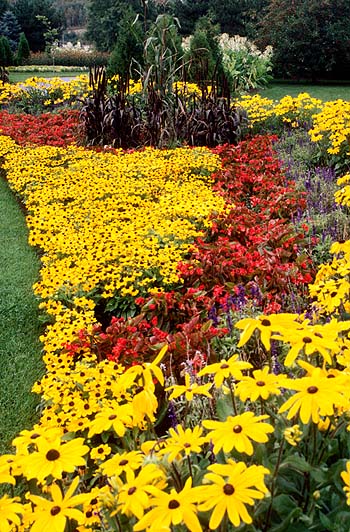
6. You have a lot more plants to work with. You can make huge displays of color or grow larger amounts of vegetables and make your garden the showpiece of the neighborhood. While your neighbours are buying a six pack or a flat of small flowering plants, for a fraction of that cost you have several dozen flats. This means you have a lot more plants to make a wonderful display of flowers, vegetables or whatever your choice all for a fraction of the cost. Creating mass plantings of flowers is easy an inexpensive.
Mass plantings give great impact and can be inexpensively achieved by growing many plants from on packet of seeds.
7. You have back-up plants. If you buy a six pack at the garden center, come home, plant them and two or more die. Now you have to go back to the garden center to get more to fill in the spaces. If you grow seeds you can plant group of plants, see how well they do, and if some fail you have more on the sidelines waiting to fill in the spaces. A fail safe backup. Almost any commercial farm works this way. A few plants always die so backups are inserted in their place.
8. Get a lot more choice than your local garden center will offer you. They only have so much space so they can’t offer as wide a range of plants as you can grow from seed. They will sell what is popular and easy. Growing them yourself means you don’t have to have the same plants everyone else does you can have something new and different. You can stand out.
9. You can grow a lot of different plants and produce a much more diverse garden. Instead of just having a couple of flats of the usual plants from the garden center you can have a dozen or more different kinds of plants. You can choose ones that flower at different times or are different colors.
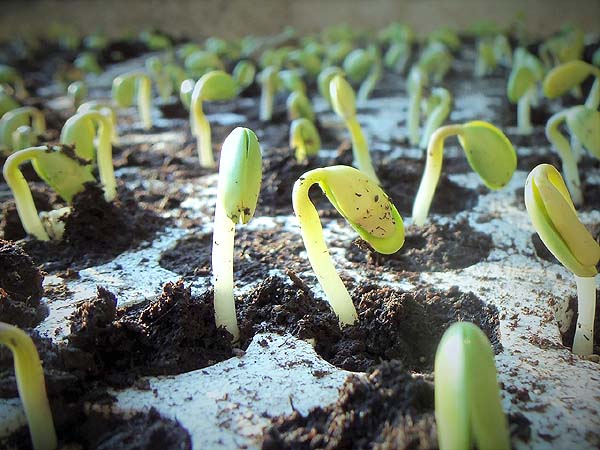
10. Growing plants from seed is a wonderful experience. Watching the little green shoots poke up through the soil and turn into large flowering or fruiting plants is amazing. It’s a great thing to do with children or all ages. It helps to link people to their origins and roots in the soil.
Larger seeds germinating
11. You can bring spring into the house early. While its still cold and wintery outside the little seedlings inside are coming up and promising an new beginning to the year. Fresh green shoots helps to take away the winter blues.
12. Its fun!
So when its cold outside and the winter snows are falling and the wind blowing. This is the time to hunker down with the seed catalogs or check out the online sites to decide what plants you want to grow this year. Then buy them and start the seeds. If you want to get your jump on winter then you need to start looking at the seed options now. For best results seeds need to be started soon. For us here in the northeast mid to late February is the ideal time to start seeds. Therefore now is the time you need to buy them.
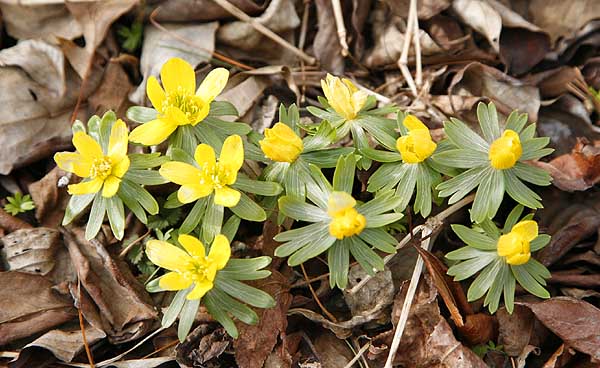
The snow melted yesterday and there under the snow were the bright yellow buds of the winter aconites (Eranthus hyemalis) Two days later the sun came out and the flowers opened and turned their little yellow faces to the adoring sun and laughed at winter.
Winter aconites are really tough little guys and even though everyone says that snowdrops are the first sign of spring mine have yet to even show a leaf. If you want early spring color in the garden to cheer your spirits then winter aconites are the way to go. These lovely little yellow flowers grow low to the ground they produce a starburst of flat green leaves with one yellow flower in the center. Aconites grow from tiny bulbs about the size of a pencil eraser but they will self seed nicely once they are established. Collecting seeds is tough though, we tried it, it’s extremely time consuming and not at all cost effective. This is why the plants are usually sold as bulbs, which at present we don’t sell.
Aconites thrive in areas where there is summer shade. So planting them under deciduous trees where they get lots of winter sunshine but are shaded during the summer is ideal. The lovely rosette leaves last into the early summer providing a nice ground cover in the first part of the year. After that the bulbs go dormant during the summer months.
Don’t plant under bird feeders since they come up at the time feeders are most active they just get pecked to death. Birds don’t care about plants they care about the seeds around them.
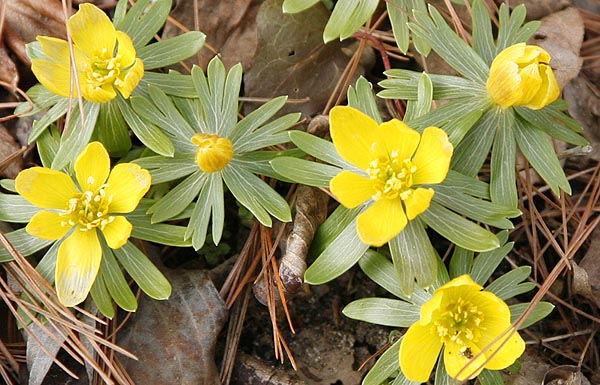
Winter aconite flowers (Eranthus hyemalis)
Aconites are a cold loving species they are hardy from zones 3 -7 so they won’t grow in the warmer areas, but heck you don’t need spring indicators in the south! They will tolerate some moisture all year around but do like well drained soil. They thrive in sunshine or semi shade but not under pine or fir species. They like a rich humus soil which is found under deciduous trees. Left alone they will self seed and form a carpet of yellow flowers in early spring, then a ground cover which can be mown back by early to mid summer so they are ideal in a grassy area under trees or mixed with later growing perennials.
Winter aconite flowers open and close with the sun. when the sun is shining their petals open and they bath in the bright rays, when it goes down or on cloudy days the petals stay closed. The flowers can last for several weeks. More if there are a lot of cloudy days and less if there is lots of sunshine and warm temperatures.
I started my winter aconites with a dozen bulbs about 25 years ago, planted them outside my living room window they grew and proliferated. It was wonderful looking out the window every spring at the constantly increase carpet of early yellow flowers.
When I moved this farm twelve years ago I dug up as many as I could which turned out to be a several hundred. Not all of them survived the journey but a lot did. I planted these under trees and in flower beds that I can see from my dining room and living room windows. I think its important that you can see them from the house windows, it’s the first sign of spring in cold weather when most people are not working outside. Being able to appreciate them from the house lifts the spirits and see proof that spring is just around the corner. Back at my old house there is still a carpet of aconites every spring so I obviously only got a few of them.
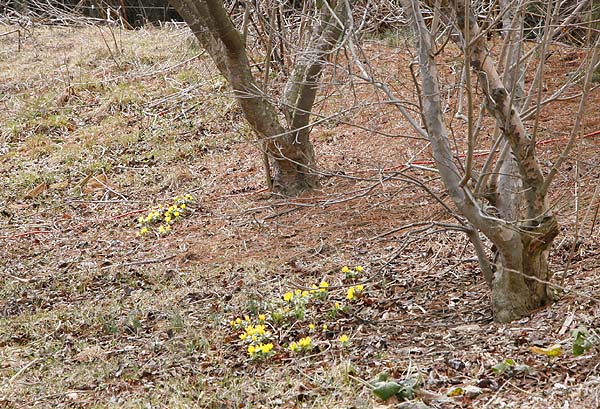
Winter aconite flowers (Eranthus hyemalis) under deciduous trees on our berm
Now I have a large clump on the berm under some of my Kousa Dogwood trees. These are always the first to flower as they get the most winter sunshine. The ones outside my living room window are located in a sheltered northern exposure and come up about the same time but don’t open as quickly. The ones in less sheltered northern exposures still have not shown themselves yet. This is fine by me. It means that my enjoyment of the yellow flowers is extended. The ones of the berm get mown over during the summer as they are in shade loving grass. The ones in the flower beds are mixed with Hostas which come up later in the year, about the time that the aconites are going down. So I get a carpet of yellow flowers followed by bright green ground cover with new Hosta leaves growing through them. By time the Hosta leaves are growing large the aconites are going dormant. It’s perfect.
Very early flowers are also important to pollinators especially honey bees. On warm late winter days they can come out of the hive for a fly around and a bathroom break. (bees don’t ‘go’ in the hive so these gals have been holding it all winter!) Finding some flowers while they are out is always a great bonus for them and an extra energy boost.
I love my aconites and always suggest that any gardener plant some. Brighten those winter blues with yellow flowers!
What you need to know before deciding on which seeds to buy.
Its cold and maybe snowy outside. There is not much chance of getting anything done in the garden.
But this is the BEST BIT.
Now you get to decide what you are going to grow this coming year.
There are several ways of going about this.
1. Decide exactly what you want to grow, then go and find the seeds (or plants) for it. 2. Have a general idea then browse the catalogs to find things that fit your theme or idea. 3. Have no idea so browse catalogs and online to find thing that take your fancy. 4. Combinations of the above.
I have to admit that 1 and 2 are what I do but occasionally something else comes up in my wanderings across the internet and I add it to my list of things to grow.
Whatever your choice winter is the best time to do this. You can curl up with a catalog, or browse online in your favorite way. Check out all the great plants that you could grow and make your choices.
It’s a great way to spend the winter afternoons. Or all day if you feel like it.
There are a few guidelines that you should work with however when choosing your seeds and plants.
1. Where are you going to put them?
This tends to be the biggest problem for a keen gardener who wants all kinds of plants but then finds there is not enough room to fit them all in the garden. Heck I have an 8 acre farm and I still have this problem. I think I would still have the problem if I had 40 acres. You tend to expand to fit the space you have.
Plants also tend to take up more space than you expect them too so plan for less and then they can grow into it.
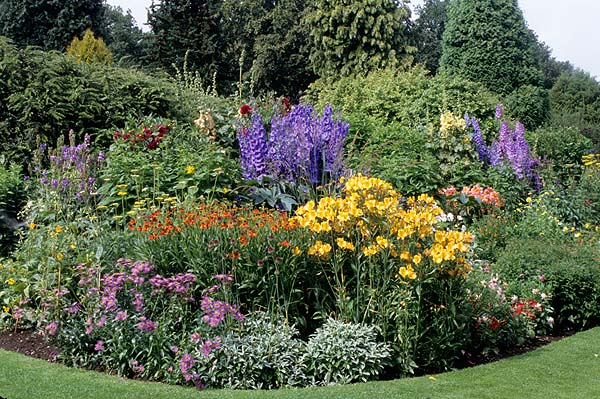
Mixed garden border. Taller plants in the center and shorter on the outside.
2. What is your climate?
This is really one of the most important factors. You cant grow tropical plants outside in Northern latitudes and you cant grow cold loving plants in warm southern latitudes. There are always exceptions. If you have a heated greenhouse then of course you can grow tropical plants in cold areas, you may also be able to grow them as annuals if your summers get hot enough. However if your summers are cool then picking something that likes a lot of heat is never going to work for you. Picking a plant that likes cool climates wont work in Florida or a tropical country either.
Always know what climate zone you are in. I will have an article on climate zones later this week so check that out if you are unsure what it means. There is a lot more to a zone map than just hardiness of plants.
Make sure you check your heat AND cold zones. This is very important when choosing plants. If for example you are zone 6 then trying to grow a plant that liked zone 8 is not going to work for you. Most seed catalogs will show the zone that the plant is hardy to. Annuals usually don’t have zone listings since its expected that the plant will die off during the winter anyway. However if an annual likes hot weather you still need to make sure that you have enough heat during the summer to grow it well.
Plant Hardiness map of the United States.
3. Know your soil type.
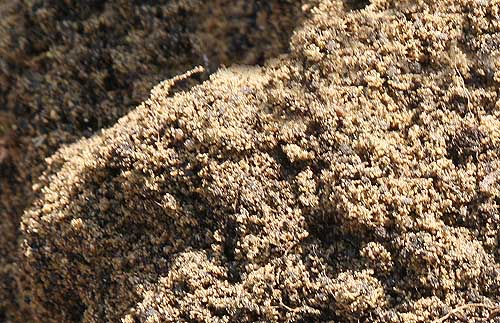
Quite a lot of plants will only grow on certain soil types. This is why when you travel to a different area you will find plants that you don’t see around your own home. Sometimes this may not be very far at all if the soil or rock type changes dramatically. There are many plants that will only grow on limestone and chalky soils. If you don’t have this type of soil then the plant will not survive unless you import soil specifically for it. The same is true of many other plants. Some like rich loamy soils, other like sandy soils some even like clay and waterlogged soils.
If a plant you are trying to grow is not doing well, do a little research and check out the soil type it prefers. It may well be that you are trying to grow it on a soil that is not suitable.
Many good seed catalogs will tell you what kind of soil the plant prefers. We always ensure that the plant seeds we sell state the preferred soil type. Trying to grow something on a different soil type might work but its not going to be as happy and healthy as the type it really prefers. So when choosing plants try to pick those that will work with your soil type.
Sandy loam soil.
4. What kind of sunlight do you have?
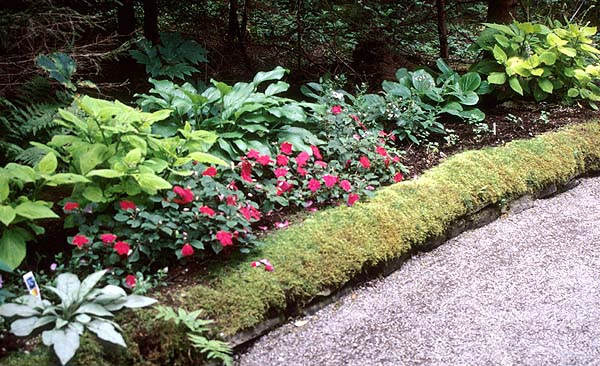
If you have full sun most of them time then your options are pretty wide. If you have a lot of shade then your options are more limited. You can still create a wonderful garden with shade but its going to take a bit more work, at least to start with. Check what kind of light a plant needs before you choose it. If you don’t have a lot of sun picking sun loving plants is going to end in disaster. If you put a shade loving plant in the sun its also going to end up dead. So determine what areas you want to plant, and what the sunlight levels are before you start. All catalogs will tell you how much sun a plant needs. Don’t ignore this its there for a good reason.
Shade loving plants growing under trees with lovely moss front border.
5. What kind of height do you want?
Some plants can grow very tall, others are very short creeping groundcovers. Make sure you know what your chosen plant is going to do. It’s a nasty surprise if you put in a plant thinking its going to be short and find it grows to 6 feet in height! Plant descriptions usually tell you how tall they will grow. If it does not then check another source until you know for sure not knowing can cause a lot of trouble in the garden later on. If creating a border then you will most likely want some that are fairly tall for the back, some middle height for the center and short ones for the front. Check out any professional garden border or photo and you will see this arrangement.
6. Decide what kind of plant you want.
Do you want perennials or annuals? Since were are talking about seeds here I will stick to those and talk about shrubs and trees in another article. While these can be grown from seed, and often are, its not the most common seed choice for gardeners
Perennials take longer to establish but then you don’t have to plant them every year, you just have to maintain them and divide them when they start to outgrow their area. However perennials tend to flower for short periods of time, the rest of the time you just get leaves.
Annuals you have to plant every single year which is more work. However annuals tend to flower profusely for much longer periods of time giving a lot more color and show.
Most people go for a mixture of both for the best results.
Bright annual border gives huge color impact but needs to be planted every year
NOW MAKE YOUR CHOICES.
So now you have a good idea of how much space you have, what kind of soil, sunlight levels and climate zone you are in. Now its time to pick your plants. This can be the hardest part, there always seem to be so many interesting plants that you want to grow and not enough time or space to put them.
Best option is to make a list of all the plants you have found that you like. How you organize this is up to you. Me I tend to open a browser tab for each plant, use post it notes in paper catalogs and make a paper list. The list is always long, much longer than I have space for.
Then comes the hard part. Cutting down the list. Crossing off the ones that you cant have, Noting the ones that you cant live without this coming year. Cutting the list down until it’s a reasonable size and the cost is not overwhelming.
A FEW THINGS TO CONSIDER WHEN CHOOSING. 1. If you are picking a plant for a particular reason say a herb that you need for health, then of course it should come top of the list. 2. Things that have really taken your fancy or you have seen and loved should be next. 3. There is always next year. You may need to make a second list of ‘what I will buy next year’ if you don’t have room for everything this year. Of course this will change next year but it gives you a foundation to work on. 4. Cross off anything that you can live without this year.
List of plants.
5. Make sure that you choose MORE than you think you will be able to grow. The reason for this is that not everything ever goes as planned. Some seeds that you buy may not germinate, others may do poorly or you may have a disaster, perhaps one set accidently did not get watered and died. Having grown plants from seed professionally for over 25 years I find that this happens to me a lot more than I would like. Sometimes plants just don’t thrive or a rabbit gets in and eats a whole crop row down to nothing. Now suddenly you have a large hole in your garden having some extra plants of a different kind to quickly fill the hole up is a lot easier than either having a large gap or having to run to the garden center and find something, which of course will cost far more than if you raised it yourself.
6. Don’t be afraid to experiment. Seeds are inexpensive compared to plants. So go ahead and try something new. IF it does not work out move on to something else. Gardeners are forever experimenting, trying new things and learning. Growing more plants that you have room for is far better than not growing enough and staying safe with a few plants from the garden center. So go wild, order lots of seeds and dig in. It’s a inexpensive way to enjoy life and its healthy for you.


 1. Life. It tends to go on around you keep you busy until suddenly, wow its spring, and we really need to get these seeds in now! This I suspect is the main reason most people don’t get their seeds in early, there is just too much else calling for attention.
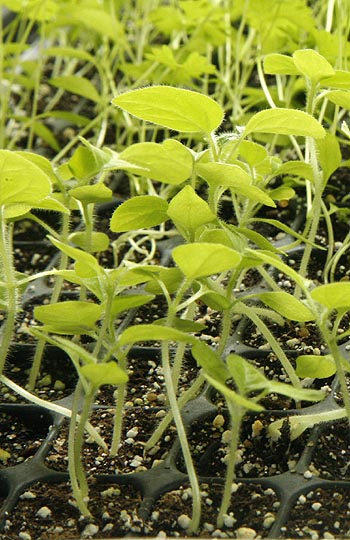

 This the fiber found between the husk and the fruit of the coconut. Most gardeners are familiar with it for use in hanging basket liners or biodegradable pots. However more recently it is being ground up into much finer mulch and used to replace peat moss in potting mixes.