Winter is the best time to plan your summer garden.

What you need to know before deciding on which seeds to buy.

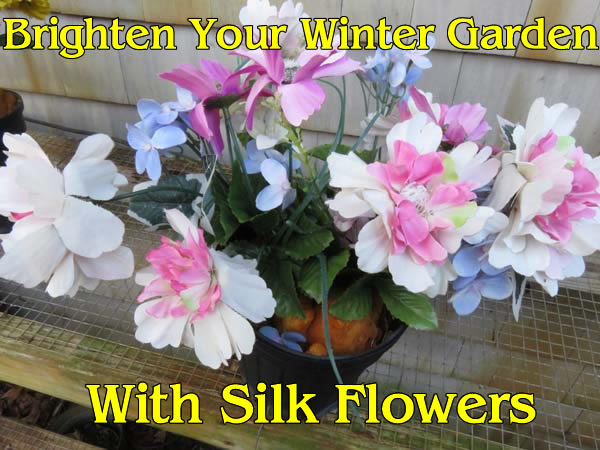
Its cold and maybe snowy outside. There is not much chance of getting anything done in the garden.
But this is the BEST BIT.
Now you get to decide what you are going to grow this coming year.

There are several ways of going about this.

1.
Decide exactly what you want to grow, then go and find the seeds (or plants) for it.
2. Have a general idea then browse the catalogs to find things that fit your theme or idea.
3. Have no idea so browse catalogs and online to find thing that take your fancy.
4. Combinations of the above.

I have to admit that 1 and 2 are what I do but occasionally something else comes up in my wanderings across the internet and I add it to my list of things to grow.
Whatever your choice winter is the best time to do this. You can curl up with a catalog, or browse online in your favorite way. Check out all the great plants that you could grow and make your choices.

It’s a great way to spend the winter afternoons. Or all day if you feel like it.

There are a few guidelines that you should work with however when choosing your seeds and plants.

1. Where are you going to put them?
This tends to be the biggest problem for a keen gardener who wants all kinds of plants but then finds there is not enough room to fit them all in the garden. Heck I have an 8 acre farm and I still have this problem. I think I would still have the problem if I had 40 acres. You tend to expand to fit the space you have.
Plants also tend to take up more space than you expect them too so plan for less and then they can grow into it.

Shorter garden border. Still taller in center and shorter on the outside.
Mixed garden border. Taller plants in the center and shorter on the outside.

2. What is your climate?
This is really one of the most important factors. You cant grow tropical plants outside in Northern latitudes and you cant grow cold loving plants in warm southern latitudes. There are always exceptions. If you have a heated greenhouse then of course you can grow tropical plants in cold areas, you may also be able to grow them as annuals if your summers get hot enough. However if your summers are cool then picking something that likes a lot of heat is never going to work for you. Picking a plant that likes cool climates wont work in Florida or a tropical country either.
Always know what climate zone you are in. I will have an article on climate zones later this week so check that out if you are unsure what it means. There is a lot more to a zone map than just hardiness of plants.

Make sure you check your heat AND cold zones. This is very important when choosing plants. If for example you are zone 6 then trying to grow a plant that liked zone 8 is not going to work for you. Most seed catalogs will show the zone that the plant is hardy to. Annuals usually don’t have zone listings since its expected that the plant will die off during the winter anyway. However if an annual likes hot weather you still need to make sure that you have enough heat during the summer to grow it well.

Plant Hardiness map of the United States.

3. Know your soil type.
Quite a lot of plants will only grow on certain soil types. This is why when you travel to a different area you will find plants that you don’t see around your own home. Sometimes this may not be very far at all if the soil or rock type changes dramatically. There are many plants that will only grow on limestone and chalky soils. If you don’t have this type of soil then the plant will not survive unless you import soil specifically for it. The same is true of many other plants. Some like rich loamy soils, other like sandy soils some even like clay and waterlogged soils.
If a plant you are trying to grow is not doing well, do a little research and check out the soil type it prefers. It may well be that you are trying to grow it on a soil that is not suitable.
Many good seed catalogs will tell you what kind of soil the plant prefers. We always ensure that the plant seeds we sell state the preferred soil type. Trying to grow something on a different soil type might work but its not going to be as happy and healthy as the type it really prefers. So when choosing plants try to pick those that will work with your soil type.

Sandy loam soil.
Sandy loam soil.

4. What kind of sunlight do you have?
If you have full sun most of them time then your options are pretty wide. If you have a lot of shade then your options are more limited. You can still create a wonderful garden with shade but its going to take a bit more work, at least to start with. Check what kind of light a plant needs before you choose it. If you don’t have a lot of sun picking sun loving plants is going to end in disaster. If you put a shade loving plant in the sun its also going to end up dead. So determine what areas you want to plant, and what the sunlight levels are before you start. All catalogs will tell you how much sun a plant needs. Don’t ignore this its there for a good reason.

Shade loving plants growing under trees with lovely moss front border.

5. What kind of height do you want?
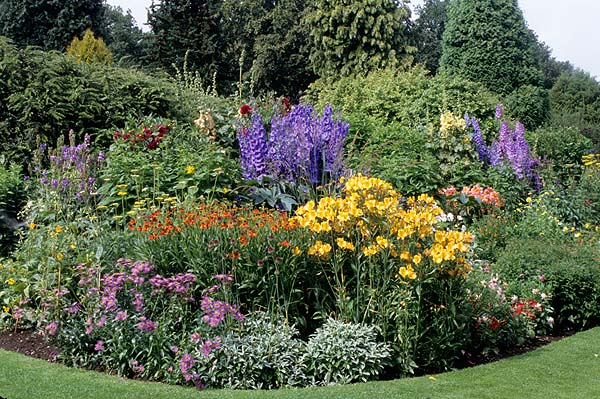
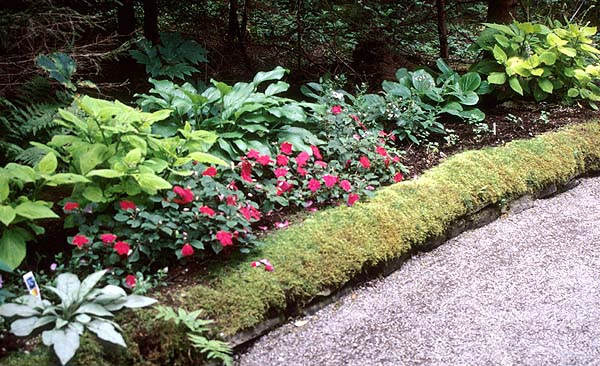
Some plants can grow very tall, others are very short creeping groundcovers. Make sure you know what your chosen plant is going to do. It’s a nasty surprise if you put in a plant thinking its going to be short and find it grows to 6 feet in height! Plant descriptions usually tell you how tall they will grow. If it does not then check another source until you know for sure not knowing can cause a lot of trouble in the garden later on. If creating a border then you will most likely want some that are fairly tall for the back, some middle height for the center and short ones for the front. Check out any professional garden border or photo and you will see this arrangement.

6. Decide what kind of plant you want.
Do you want perennials or annuals? Since were are talking about seeds here I will stick to those and talk about shrubs and trees in another article. While these can be grown from seed, and often are, its not the most common seed choice for gardeners

Perennials take longer to establish but then you don’t have to plant them every year, you just have to maintain them and divide them when they start to outgrow their area. However perennials tend to flower for short periods of time, the rest of the time you just get leaves.
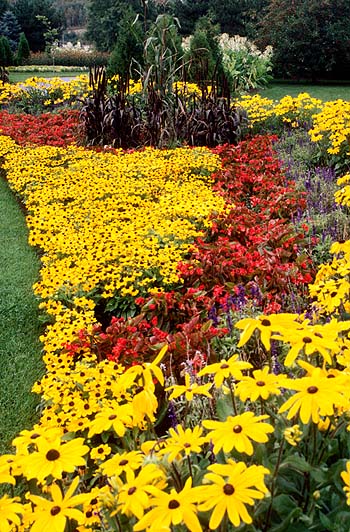
Annuals you have to plant every single year which is more work. However annuals tend to flower profusely for much longer periods of time giving a lot more color and show.
Most people go for a mixture of both for the best results.

Bright annual border gives huge color impact but needs to be planted every year

NOW MAKE YOUR CHOICES.
So now you have a good idea of how much space you have, what kind of soil, sunlight levels and climate zone you are in. Now its time to pick your plants. This can be the hardest part, there always seem to be so many interesting plants that you want to grow and not enough time or space to put them.

Best option is to make a list of all the plants you have found that you like. How you organize this is up to you. Me I tend to open a browser tab for each plant, use post it notes in paper catalogs and make a paper list. The list is always long, much longer than I have space for.
Then comes the hard part. Cutting down the list. Crossing off the ones that you cant have, Noting the ones that you cant live without this coming year. Cutting the list down until it’s a reasonable size and the cost is not overwhelming.

A FEW THINGS TO CONSIDER WHEN CHOOSING.
1. If you are picking a plant for a particular reason say a herb that you need for health, then of course it should come top of the list.
2. Things that have really taken your fancy or you have seen and loved should be next.
3. There is always next year. You may need to make a second list of ‘what I will buy next year’ if you don’t have room for everything this year. Of course this will change next year but it gives you a foundation to work on.
4. Cross off anything that you can live without this year.
List of plants.

5. Make sure that you choose MORE than you think you will be able to grow. The reason for this is that not everything ever goes as planned. Some seeds that you buy may not germinate, others may do poorly or you may have a disaster, perhaps one set accidently did not get watered and died. Having grown plants from seed professionally for over 25 years I find that this happens to me a lot more than I would like. Sometimes plants just don’t thrive or a rabbit gets in and eats a whole crop row down to nothing. Now suddenly you have a large hole in your garden having some extra plants of a different kind to quickly fill the hole up is a lot easier than either having a large gap or having to run to the garden center and find something, which of course will cost far more than if you raised it yourself.

6. Don’t be afraid to experiment. Seeds are inexpensive compared to plants. So go ahead and try something new. IF it does not work out move on to something else. Gardeners are forever experimenting, trying new things and learning. Growing more plants that you have room for is far better than not growing enough and staying safe with a few plants from the garden center. So go wild, order lots of seeds and dig in. It’s a inexpensive way to enjoy life and its healthy for you.

Keep your garden cheerful in winter with silk flowers.

Brighten the dull season and add more cheer.

Lets face it winter can be pretty bleak. It’s cold, there are no leaves on the trees the plants are not growing. Garden cleanup is as finished as it can be with cold weather upon you. But looking out the window can be depressing. All those lovely flowers have gone.
Well they don’t need to be.
Every summer I have a lovely patio area outside my kitchen window that is bursting with blooms it’s a delight to look at. In winter not so much, its bleak and cold. So fix it.
Adding a few pots of silk flowers can really cheer up the area. Now every time you look out the window there is something bright to look at it brightens up the winter months until spring brings the green back to the world.

Patio area in winter looks dull, depressing and uninviting

The great thing about it is that its easy to do and not very expensive.

All you need is.

  • Empty plant pots. Keeping the ones you got the plants in from the garden center or big box store is always a bonus.
  • Some stones from your garden. Hey who doesn’t have those. Now you actually have a use for them!
  • Some silk flowers. Get them in the dollar store. Its not necessary to use expensive ones just something bright.
  • A can of ‘Great stuff’.Optional- some wire to put through the bottoms of the pots.
  • The wire option can be very useful if you are intending to put the pots onto wire shelving or somewhere else they may fall off easily and could be wired into place.

WHAT TO DO.

1. Buy a bunch of silk flowers from the dollar store. The ones that come in mixed bunches on the same stem are the best option as they need less work. However they are not always as easy to come by these days. Whatever have great time choosing as many silk flowers are you like. Its best to pick a few more than you think you will need as its much better to have too many that not enough.
Suggestion. Don’t pick Christmas flowers. It’s tempting just after Christmas to pick all the cheaper Christmas stuff but these flowers are going to be out there until spring. It may look great in December but it looks dated by March. A little holly and maybe one or two poinsettias is OK but for the most part pick spring and summer flowers. You will be happier in the long run.

Can of "great stuff"
Can of “great stuff”

2. Buy a can of ‘Great stuff” See if you can determine just how much you will need for the number of pots and buy a can the right size. Great stuff IS great BUT once you start using a can of it you have to use it all in one go. You cant leave some for later. Once started it works fine but left it sets in the can and is of no further use. So you don’t want to use half a large can when a full small can will do.

Plastic flower pot saved from earlier potting out

3. Sort out some old plastic pots to use. The plastic pots that your last purchase from the garden center or big box store came in is perfect. Use only plastic pots NOT ceramic. They have to stand up to the cold and fluctuating temperatures. Plastic will do this fine. Ceramic will crack over time. They are also more expensive and you don’t want to waste them.
Pick pots that are not too big, unless you intend to do a large planter. Smaller pots are easier to work with and to fill with silk flowers. Pots need to be full of flowers to do their job properly so smaller pots are better. I used 5” (12 cm) pots.

4. Go find some stones. Stones are essential to keep the pots anchored. Pots need to be heavy if left outside or they will blow away in the wind. The heavier you can make a pot the better. So go out and collect as many larger stones as possible. Some people collect up stones from their garden and put them in a pile. Now that pile is finally useful. If not then a scavenger hunt around the garden will be in order. Use larger stones Make sure that they cannot escape through the holes at the bottom of the plastic pots. If stones are that small discard them.
DO NOT use soil! It’s tempting but the great stuff will not bind the soil together and it will leak out the holes at that bottom of the pot as it dries out. Pots can leak soil for years. Trust me I made this mistake with my first set of pots. Don’t make my mistake leave the soil on the ground and use stones.

For those in warmer areas, or if you have had time to plan in advance. You can use concrete to do this job. However if you left it too late and its cold the concrete will not set. Also it’s harder to keep the flowers in the correct upright position until the concrete sets. Thus “great stuff” is the best fast option.

5. Divide up your silk flowers. Decide which flowers are going into each pot and divide them up. If you are intending to do a large planter then it would be best to determine how the flowers will be placed before you begin. Plan out which flowers go where. There will not be much time to change your mind when you start working so figuring out your layout beforehand is essential.

6. Wire. If you are going to put your pots onto wire shelving or in an area where the pots may easily be knocked off then using wire at the base to keep them in position is a good plan. Use a thicker gauge wire. That found in wire coat hangers is ideal. If you have wire ones from the dry clearers perfect (another good way to recycle and reuse). If not buy as spool of similar gauge wire from your local hardware store.

NOW TO BEGIN.

1. OPTIONAL. If using wire cut the wire into lengths depending on the width of the pot and how much you need to wire it down. Usually a 24-36” long piece is ideal. If using a coat hanger cut the looped piece off the top of the hanger and flatten it out.
Thread the wire through two holes along the bottom of the pot. In one side out the other. Make sure that the pot is centered on the wire.

flower pot with stones in it
Fill pot to 3/4 with stones

2. Fill all the pots with stones to about ¾ of the way to the top of the pot. Shake the pots or tap them on the work surface to ensure that the stones are settled well in the pots you don’t want them shifting later.

3. Lay out your flowers ready for each pot. Know exactly what you are going to put where. Check that they will fit where you want them in the pot of stones and cut down the wire stems if necessary.

4. Get your can of “Great stuff” put the thin nozzle on the end and get the can ready to go. If you have not used this stuff before be aware that it will foam up and expand a lot once its in the air so take is slow when using it until you get the hang of it.

5. Stick the nozzle down amongst the stones and gently press the top. The idea is to get the great stuff to stick the stones together. Work it in from several angles using just a little. Once the stones are in place add a little more on the top to fill the pot up almost to the surface.

silk flowers in pot with great stuff
Great stuff fills the pot and hardens quickly around silk flower stalks.

6. Quickly place your silk flowers in the pot and hold them in place. Great stuff sets fast so you will only have moments to do this arrange the flowers as you want them to appear. Remember you can always bend the stems around once they are set in place.

7. Move on to the next pot and repeat the process until you have finished all the pots. Work each pot from start to finish as you wont have long before the “great stuff” sets.  Don’t take too long on each pot or the great stuff can stick in the can and become useless.

8. Once all the pots have set you can bend the flowers around to cover the great stuff in the pots and make the flowers look their best.

9. Place pots around your garden outside your windows where you can see them when you look out and brighten your winter.

winter_patio_silk_flowers
Patio decorated with silk flowers looks much more cheerful for winter months. These pots are wired in place or the blow off in strong winds.

When spring comes pots can be taken in and stored until next winter. Once created these silk flower pots will last for years. My first set lasted me ten years before they finally broke apart and had to be replaced.

OTHER TIPS.

1. Don’t put pots under downspouts or other areas where lots of water will runoff the roof. The water tends to drop on the plants and freeze then you get silk flowers encased in ice. They don’t last as long this way.

2. If pots are placed in a precarious position or on shelving wiring them down can be an excellent idea. Strong winter winds can lift up pots that you thought were heavy enough and blow them away. Its not fun having to chase them around in the dead of winter. Also if you have pets that might knock them off wiring down might be prudent.

3. If you choose to make a large planter remember first that this is permanent. Once the great stuff is in there you can’t take it out so don’t use a favored planter that you want to use again in summer. If you do want to use a favored planter then choose a separate pot that is just a little smaller and put your display in that, then drop it in the planter. It can then be taken out in spring and replaced until next winter.

4. If using a large planter not as many stones will be necessary. If you fill it with stone you won’t be able to pick it up and move it later. However still don’t use soil as the great stuff will not bind to it and it can cause the display to break up.
A good way to fill a planter is to use layers of polystyrene packing chips or chucks of polystyrene packing that came you’re your last purchase. If doing this test the “great stuff” on your chosen material before you start some products will react with it and may dissolve. DON’T use starch packing chips they will certainly dissolve.
Mix the material with stones and bind it together with the great stuff. Work in layers until you reach the top of the planter. Make sure you use enough stones to give the planter enough weight that it wont be blown over by strong winds but still light enough for you to carry around.
Make sure you experiment with the flowers and decide how you want them arranged in the planter before using the great stuff. You won’t have a lot of time to work once it’s out of the can before it sets.

Let your artistic side roam free and create some bright interest for your garden this winter.