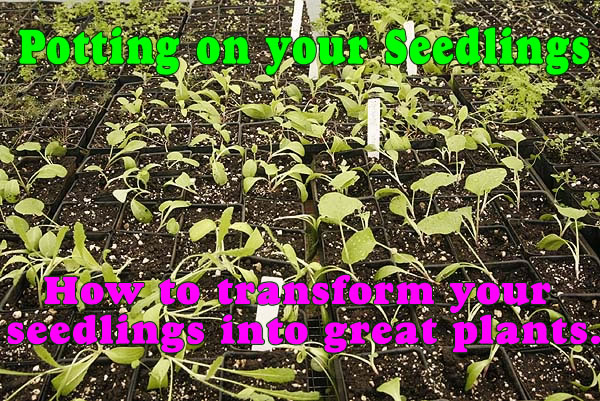
How to transform your seedlings into great plants.
Once your seedlings have grown to a good size in their seeding trays then its time to transplant them into larger pots so they can grow to a large size before planting them out in the great wide world. Starting seeds in either plug or seed trays allows seeds to be intensely cared for while they are starting their life. Once they start to grow strongly then they need to be moved to larger pots to allow them to keep growing to a larger size before being moved outside.
Can’t I plant directly outside from a plug tray?
That is going to depend on how large the plugs in your tray are. If the cells are 1 ½ – 2” (3.8 – 5 cm) across with individual plants in them then most likely you can. If the cells are smaller the plants usually cannot reach a large enough size to be planted outside with certainly that they will survive. This is especially true now that temperatures are fluctuating so much due to global warming. In past times temperatures in spring did not reach the 90’s as they do now. Little plants cannot survive well in such temperatures and tend to fry very quickly. If you are going to make all the effort to grow your plants from seeds its all wasted if they are put in the ground too small and die.
Pots for potting on.
First thing to do is to secure a supply of reasonable sized pots. Here we use 2 ½” (6.35 cm)square pots. The reason for this is that square pots are easier to stack in a seed tray and deal with little or no wasted space. We have found this size pot is ideal for all our potting on needs and 32 fit exactly into a outer seed tray or carrier tray. You can choose whatever size or shape pots that you prefer but using square ones to minimize space is always a good consideration. We use all plastic pots these can then be washed and sanitized with bleach so they can be used time and again for many years. This is the most economic way to pot plants on.
Potting mix.
Potting mixes can be purchased in bags from most garden centers or big box stores. See How To Choose A Potting Or Seeding Mix for details on choosing a mix.
If you need quite a lot of potting mix and have company near you that supplies plants to garden centers you can always call and ask if they sell their potting mix. Most of these companies create their own mixes for their use and will often sell bags of it to the public. IN most cases you do need to buy several bags at once or they may have a minimum value order. Don’t call and ask if you only want one bag, you will need to be considering at least 5 or more bags before they will even consider you.
Mixing your own.
Choosing a base.
If you need quite a lot of potting mix you can create your own if you choose. If doing this you will need a supply of ‘base mix’ that is the main ingredient to the potting mix. In some cases this will be sphagnum moss or coconut core but you can also use well rotted and seasoned compost that has been well screened and was created at high enough temperatures to kill all the weed seeds. There may be many other local sources that you can use.
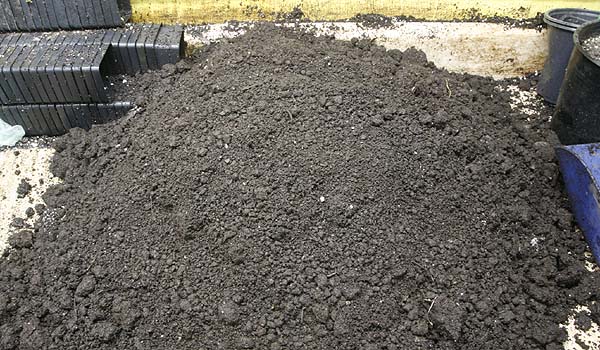
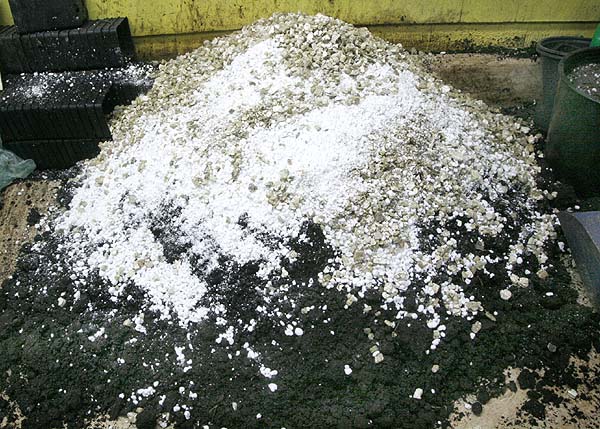
mushroom compost base for potting mix
Here at Floral Encounters we use mushroom compost. Simply because it is cheap and readily available. This will not be the case in most parts of the country but we live near the major mushroom growing areas and they have tons of spent compost moving through their houses daily. We buy well rotted (for one year after leaving the compost house) screened organic Ph balance compost by the truckload. We then use it on our fields and for making our own potting mixes. Whatever you choose ensure that this material is MOIST before creating your mix. Not wet but just moist all the way through so when you grab a handful it feels slightly moist but not wet. The material you choose should separate easily and be slightly fluffy to the touch.
DO NOT use soil from your garden. This is always going to be too heavy and it will contain lots of weed seeds and other material that could be detrimental to the growing of your small plants. This may seem strange since you are going to put the plants in the soil later but soil outside in the ground behaves very differently to soil in pots in a tended location such as indoors, in a porch or on a windowsill. Outside is a whole different ecosystem but in a tended location pathogens, weeds or pests dormant in the soil can become active and kill off you seedlings very fast, so always use a sterile mix not garden soil to pot plants on.
Adding the mixture.
Once you have chosen your base and ensured that it is all moist then its time to mix in the other ingredients.
In almost all cases these are
Perlite
Vermiculite.
For more detailed information on these ingredients please see How To Choose A Potting Or Seeding Mix.
potting mix ingredients ready to mix
The best results usually have about 15% of each perlite and vermiculite in a mix. These ingredients can be purchased in small bags from most garden centers or big box stores. If however you intend to use a lot of the material you may want to see if you can find a commercial source. Most greenhouse supply companies sell this material in large bags. Check your area to see if you can find one then call and ask if they will sell to the public. Many will not sell to you unless you have a business license. Bear in mind however that any business license will usually suffice it does not have to be horticulture.
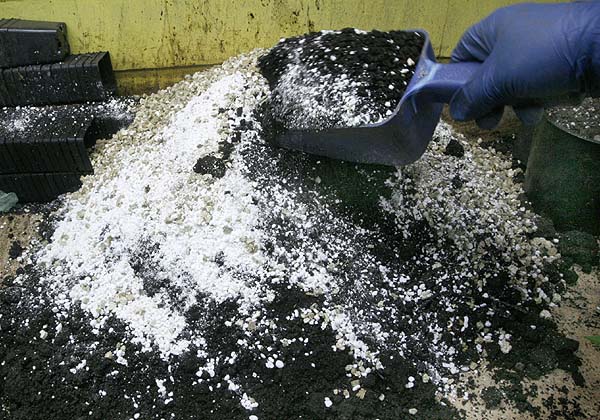
mixing potting mix ingredients together
USE A MASK WHEN WORKING WITH PERLITE AND VERMICULITE.
Never work with these materials without using a face mask. Perlite especially is extremely dusty and will not to your lungs any good at all. Put on a face mask before opening the bag and moving the material. Use a plastic scoop to move material from the bag to your potting mix once the material has been added than you can mix it all together. Take a look at the result and adjust the amount of any of the ingredients until you have something that looks right. Time and experience is the best for this using your own chosen materials. Small batches can be mixed on a potting table larger batches can be made directly in a wheelbarrow.
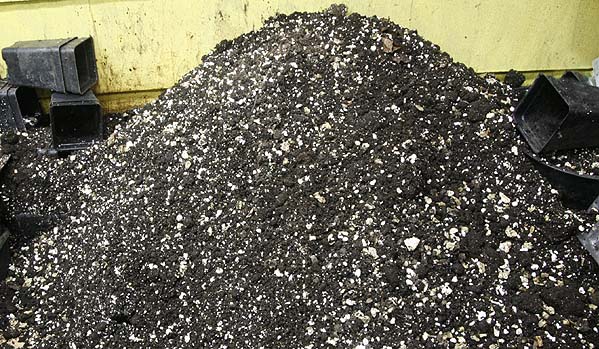
completed mix should look something like this
Filling the pots
Once the mix is finished the pots can be filled. Scoop the moist material into each pot and stack in the tray. When all the potting mix has been used or enough pots have been filled then water all the pots. If you have a stack of trays like we do then move all the trays around so you can water each one well then restack them ready for planting. Its important to ensure that the potting mix is well moistened before you begin potting. Using the ‘shower’ setting on your hose pipe is the ideal way to do this. Make sure you don’t spray water all over your potting area in the process as potting mix tend to cling to everything and you will trample it everywhere.
Making ‘holes’.
making holes in mix ready for plants
Seedlings need a hole to be planted into if they are a plug or bare rooted they will still need a hole. The best way to do this is with your gloved finger. (Its going to get really messy if you are not wearing gloves while potting). Stick your finger into the center of each pot to make a hole in the mix. If the hole does not stay there when you pull your finger out but crumbles and falls in then your mix is not moist enough. If it goes ‘squelch’ then its too wet and you need to let it dry out a bit before planting.
When to repot.
Check on the root ball of your little seedlings. If they roots are starting to show out of the bottom of the plug trays then it is the ideal time to repot. The best time is when the roots have filled the cell so that they hold the soil together while being moved to their new home. This ensures the minimum disturbance to the roots. IF the roots are still small and the soil falls away from them then they are more prone to failure on repotting. If the roots are so large that they have created a mass of roots below the seeding tray then roots will be damaged on repotting and plants will have a harder time. They may recover but it will take longer for their roots to regrow before they can start creating more leaves and getting larger.
Moving seedlings.
This is going to depend on how your seedlings were planted. Plug trays.
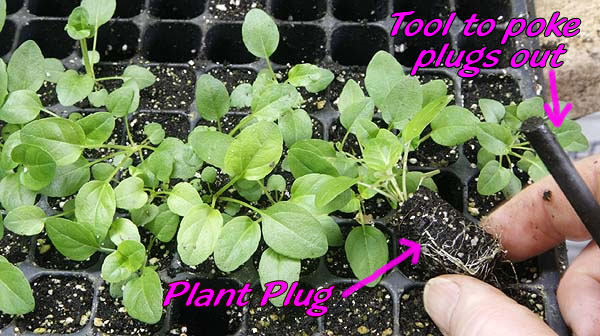
Assuming you have one plug per tray its going to depend on the size of the tray as to which tool you use to remove the plug from the tray. We use a variety of tools. For our larger plugs we use a stainless steel ‘mini gardening tool’ that are actually sold for indoor gardening but work wonderfully for this task. The long pointed ‘shovel’ of other mini tools works just as well.
tray of plug plants ready for potting on
For small plug trays it’s a matter of pushing the plug out the bottom of the tray. For this we use a plastic rod. This one I got recycled from a pair of shoes that came with ‘shoe holders’. Usually its trash to be thrown away but farmers are the ultimate in recycling.
plant plug removed from tray
Whatever tool you use to remove your little seedling from its original home make sure that the roots come up cleanly in one lump of soil try for as little root disturbance as possible when repotting. Sometimes the soil will fall away from the roots in these cases make sure that the roots are neatly tucked into the hole you created for the plant and gently pull the soil in around the little plant.
With plug trays there is usually no reason at all to grab the plant when repotting all the work should be done with the root ball this reduces the stress on the plant.
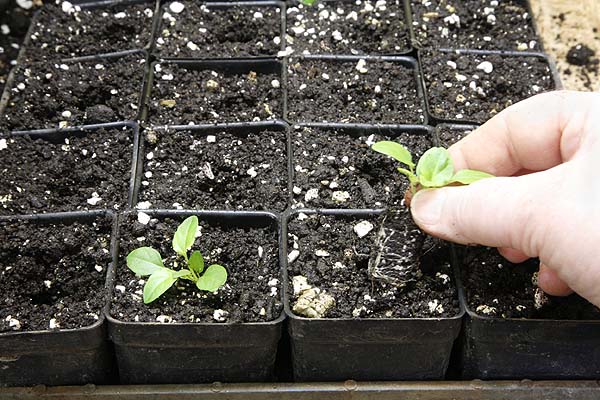
placing plant plug in prepared hole in larger pot
General seeding flats.
In seeding flats is more difficult to move plants without disturbing the roots. Plants need to be ‘dug out’ of the seed tray. Again the best tools are the mini gardening tools sold for indoor gardening. The shovels are ideal for this task. If you don’t have one try a very small teaspoon. (no all teaspoons are not the same size).
Carefully remove each plant ensuring you get all the roots. IF plants have grown together carefully and cautiously separate the roots from one another trying not to break any roots. Transplant to new pots. You may need larger holes and more time and care placing each plant to ensure that all the roots are carefully in the pot and covered well with soil.
IF there are any plants that are much smaller than the rest but have had their roots disturbed by moving the larger ones you have the choice of leaving them in the seeding tray or transplanting them at the same time. It is often better to transplant unless they are very small as this means the roots will only be disturbed once rather than twice. If the smaller plants roots are nowhere near the plants you dug up then leave them to get bigger before transplant.
Holding seedlings.
When moving seedlings from general flats and sometimes with plug trays you have to get hold of the seedling. Some seedlings are very small and fragile so great care must be taken. The main rule is.
NEVER GRAB THE SEEDLING BY THE STEM. You get that stem broken and it’s the end of the plant. It cannot regrow a central stem it’s the only one it has. ALWAYS hold a seedling by one of the leaves. I know that is not always that easy, but it can regrow a leaf it cannot grow another stem. For seeds with fragile stems like balsam, impatiens, peppers and such like be very careful as the stems snap very easily. Some plants have much more wiry stems and are easier to handle, but often they don’t like it and if you grab the stem the plant may not survive anyway so take care.
Another way to handle seedlings is using broad plastic tweezers to hold the plant leaves while transplanting. This ensures that you have a good grip on the plant without causing it too much harm. Fingers can be a little large and clumsy when dealing with little seeds but plastic tweezers can work very well. Make sure they have a broad end not a point. Metal tweezers are usually too harsh. We used this method a lot before we changed to using plug trays.
Plants with tap roots.
While many sources say that you cant grow plants with tap roots in pots to begin with, its not true. It just means that you need to be very careful not to disturb the roots when transplanting. There are several important factors here. 1. Know that the plant you are dealing with has a tap root. Its surprising how often people just treat all the plants the same and then wonder why the ones with tap roots did not survive.
2. Always make sure that the plants are transplanted without disturbing the root ball. That means, DON’T grow them in open flats use plug trays or individual pots. When transplanting plugs make sure they are moved before the roots come out the bottom more than just a little showing. Transplant the whole ball without disturbance.
3. When planting out use the same methods as for plugs. Keep an eye on the pots and move them out as soon as the roots start to show out the bottom.
Once the plants are in their new pots.
The first thing to do is water them. Now using the misting nozzle on you hose or the misting bottle you have been using. Make sure there are well saturated.
Move the trays to a good location.
Locating your potted seedlings.
In many cases the pots can go back into the same area that you had the seed trays. However they are now going to take up a LOT more space than they did before so plan accordingly. In most cases the weather outside is not yet suitable to put the pots out so find a good location inside or in a very sheltered area out of the sun. Although daytime temperatures may be good enough often the temperature drops too low at night. So if putting plants outside keep a good eye on the overnight lows and move the plants inside if they get below the high 40’s.
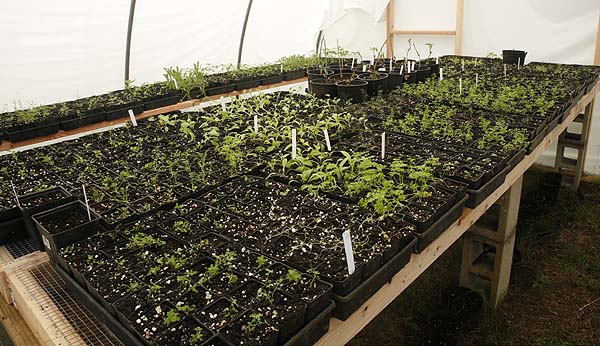
Inside a window in full sun is acceptable or under grow lights. Find your own best space. We used to use a large window in full sun to grow our seedlings and our potted on plant them move them to a cool greenhouse as they acclimatized. Now we have a new potting greenhouse with white plastic to ensure that they plants to not fry in the hot sun.
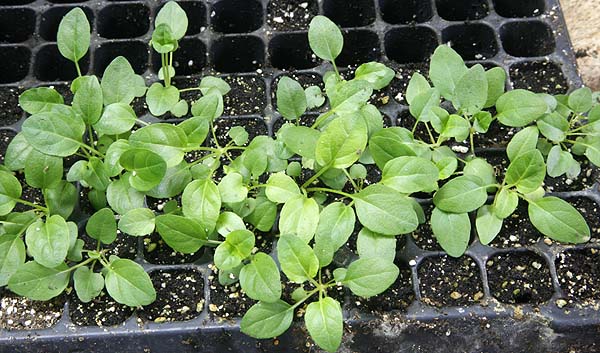
Trays of recently transplanted seedlings in our new potting house
As the seedlings grow.
Do not place any newly potted on plants outside in full sunshine. They will need time to acclimatize to their new home and get their roots established. Once they are reestablished and the temperatures rise sufficiently put the plants outside in a shaded location off the ground. A shaded bench or table that does not get sunshine during the day is best.
As the seedlings grow they can be moved to dappled shade then full sunshine. Never move any plant from the shade to direct sunshine all at once it will burn just like you would. Take it gradually. Once the plants have hardened off and are used to the sunshine they can be moved out to their final position in the garden. More on that in a later article.
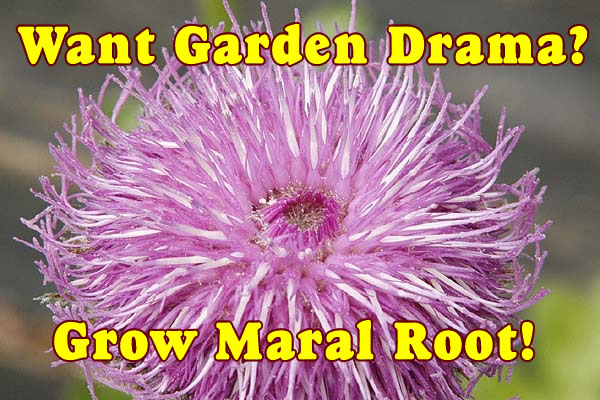
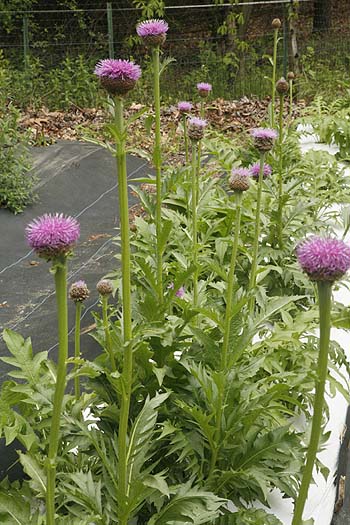
If you want drama and beautiful flowers in your garden at this time of the year then Maral root is for you. Exclusively for northern climates though, as Maral Root does not like really hot weather, but heck we need big dramatic plants in cooler climates.
I just love this plant. Beginning in late April the thick flower stalks start to rise from the large leafy base. Its hard to stay away from them as the stalks get longer and thicker with a big rounded dome of a flower on the top. Finally the flowers open to show these large purple flowers that can last for several weeks. These flowers are so big and showy that they draw everyone to see them.
Maral root plants flowering in our field
Nothing much else is flowering at this time of the year. Most spring flowers have finished and the summer ones are still thinking about gearing up so Maral root fits nicely into that gap where there are few flowers except shrubs in the garden. If you have the space its well worth having and everyone will admire (and possibly covet) your plants. Once established they take very little care at all, some water and a little feeding to keep them in top shape and remove the dead leaves in the winter. That’s about it.
The downside is that they do like cooler weather as they are a native of Siberia. Most likely won’t grow well below zone 7a but above that right up to zone 2 and most likely zone 1 if it’s well mulched over the winter.
It’s a tough perennial that will flower from seed in the second year and then keep flowering and growing bigger as the years go along. It has large tough roots which can be very hard to dig out once established so choose your location well.
Its fairly easy to grow if you start the seeds early and keep them cool. Zones 6 and 7a plant in a semi shaded location lower number zones full sun should be fine but don’t put them in suntraps where they may overheat.
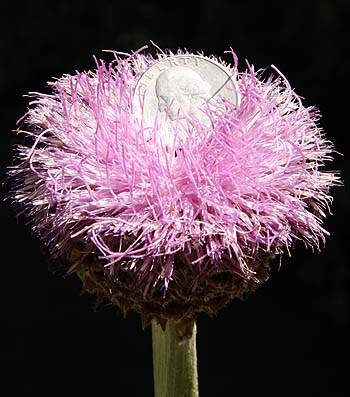
Maral root flower with US quarter
The only problem is that other mammals also like Maral root. Deer seem to really enjoy the leaves, we think the rabbits eat them but since the deer do its hard to tell. The only managed to flower after we put them behind a deer fence, but even with deer browsing the roots refused to give up and die.
Voles are another problem. These plants produce big fleshy roots which are used in herbal medicine well the voles like them too and will eat the roots out from under the plants. Controlling voles may be very necessary if you want to have good Maral root plants. Or plant something else the voles like better (like Angelica) and let them eat that instead.
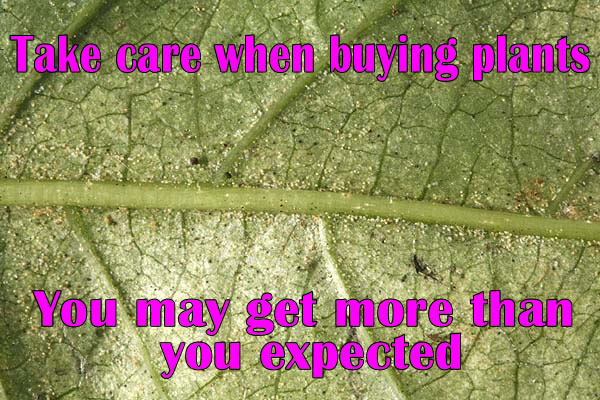
Make sure you don’t bring home more than you expect.
No matter if you are buying plants in the garden center or from a mail order company, check your plants before you buy or plant them. They could have bugs or disease that you don’t want to bring home.
While most plant companies do their best to supply good healthy disease free plants that is not always what happens. An excellent example is impatiens downy mildew that decimated the Impatiens growing in the northeast several years ago. Working the master gardener hotline we were inundated with unhappy gardeners who found their Impatiens dying on them. One day the plants were fine the next they were just stalks. This disease was brought in on plants grown outside the area and looked fine when they were sold but soon developed the disease and all of them died. Since this disease can live on in the soil for many years it now means that we can no longer grow Impatiens in our area a devastating loss for those who loved color in shaded areas.
Just last year I had a man call our Master Gardener Hotline and ask how to deal with a pest on his plants. After some questioning the story unfolded thus. He had found some plants at a big box store on heavy discount. They had bugs on them, he could see that but he thought he could ‘save them’. So he bought them and brought them home. He planted them in his garden then sprayed them with something. Now he is calling me because his spray did not work and the bugs have spread to all the plants around is ‘saved’ plants some of which are now dead and others are on their last legs.
Moral of the story. Don’t bring home diseased plants and try and ‘save’ them. Pass them right by and go for the healthy ones only. It might sound like a bargain but if it takes off in your garden it could cost you dearly in other plants.
Mottled leaf of kiwi vine. All the leaves looked like this one. Not a healthy sign
How to inspect plants before you buy.
Always look carefully at every plant you buy in a garden center. For the most part good garden centers are very careful with their plants and only sell ones in excellent health but small numbers of bugs or lurking diseases can get through as cased by the impatiens disaster.
Look at the leaves are the mottled, do they have streaks.
Look at the underside of the leaf, this is where bugs hang out most of the time so you should be able to see them if they are there. They may be little spots tiny bugs
Are the leaves shiny and sticky? This is a sure sign of leaf sucking bugs. Check the plant but also look up. Sometimes the plants have been put under trees or other plants which may have the bugs on them not the plant you want to buy. Check all the leaves just to be sure.
Check the buds. Often bugs like to hang out on the newly formed bugs since they are young and tender. Look to see if there are any extra lumps or spots.
Look at the stems or tree bark . Are there any bumps. Can those bumps be wiped off with your fingers? If so its got scale you don’t want it. Scale is very hard to get rid of.
Look for any downy, powdery or white splotches on the leaves. Mildew is common on quite a few plants you may get it in your garden anyway but don’t take home extra.
Look at the overall plant. Does it have black or dying leaves, leaf tips or shoots. This could be a problem too.
Go with your gut. If the plant just does not look healthy, leave it behind. Find another garden center that has better plants. You may have to pay more but its worth it not to kill the rest of your garden.
Buying plants by mail.
Most nurseries that sell by mail do a wonderful job. We have bought plants many times from different companies. Sometimes there is no choice if you want a specific plant then you have to. However you should always check all material that comes in. Don’t just assume that its fine.
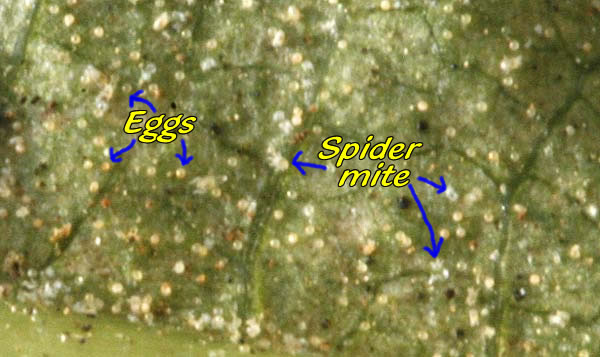
Recently we purchased some new kiwi vines (long story for another blog entry). One of our interns started to unpack them until I yelled at them to stop. The leaves of the plants were all mottled, an obvious sign that something was wrong with the plants. I looked under one of the larger leaves and was shocked to see hundreds of spider mite eggs. This plant was totally infested!
Underside of kiwi vine leaf showing masses of egg cases
I have never had such a plant sent to me before. I contacted the company and they issued a refund since their whole greenhouse was infested they could not send me clean healthy plants.
The questions this raise in me were:
How come they did not notice when they packed the plants?
How come no one was scouting the greenhouse and noticed that there was a huge infestation of spider mites? This was one of the worst I have seen. This should have been spotted in the greenhouse long before it go this bad.
How could you try and send me such an infested plant?
How many other people had they sent infested plants to?
Masses of Spider mites and eggs of kiwi vine leaf
Hopefully other gardeners who received such plants also complained and got refunds. Never accept any material that has disease or bugs on it. You introduce that into your garden and it could infest all your other crops. Always inspect any plant that arrives are your door before you plant it. Make sure there is nothing wrong with it. If unsure then isolate the plant somewhere away from all other plants the may in any way be similar and grow it on it a pot for a while to see what develops. This is what all commercial nurseries do. They are always buying material in from other nurseries. They have a ‘quarantine’ area where all new plants go for a while to be checked out and ensure that they don’t have any problems before they are moved into the ‘general population’ of the main nursery. Commercial growers don’t ever want to introduce something into their plants that is going to cause a problem because it could cost them a great deal of money.
You don’t want that either. It may not be your livelihood riding on the plant disease but the beauty of your garden is. So check your plants out. Make sure they are strong and healthy before you get them anywhere near your other garden plants. Never ever bring home a sick plant and try to ‘save’ it. It could cost you your whole garden.
Cilantro is a charming and very versatile herb which many people often find difficult to grow. I am probably asked more questions about growing this than any other herb. It’s not really hard to grow, you just need to know it’s secrets then it’s pretty easy. Here is how.
Cilantro is a interesting two in one herb. The leaves are used in cooking and called Cilantro, while the seeds – actually they are ‘nutlets’ not seeds but we will get to that – are also used in cooking and are known as coriander. So you can grow this and get two herbs for the space and price of one.
Most people tend to want and use the leaves of this plant so we will refer to it as Cilantro here. This plant likes cooler weather and does not like hot sun, so if you planted your seeds or transplants in full sun for a summer harvest you are going to be very disappointed. The poor little things will just wilt and die.
The need to be planted in spring and fall for a good harvest. You can get away with planting in the early summer if you choose a location in your garden that stays cooler. Perhaps it gets a nice breeze from across the lawn or is sheltered by some trees. The location will also need some shade from the hot noonday sun to get any plants growing past late June.
As we said before Cilantro seeds are not really ‘seeds’ they are called ‘nutlets’ this is because each ‘nutlet’ contains several seeds in together. Don’t try and crack them apart to plant separately they really don’t like that.
This means that you will get several little plants growing in the same space. This is just fine, in fact its best if you plant several nutlets in the same area so you get a nice little bunch of leaves growing in a clump. This makes them much easier to harvest when you want them.
Cilantro is one of the plants that you do want to direct seed it does not do well in transplants and you get much stronger plants if they are direct seeded.
Cilantro grows quite quickly so don’t plant more than you can deal with in one go. It might be best to plant a few every week or so. That way you get a continuous supply of leaves to use for a longer period of time. Don’t expect to get any in the summer months in hot areas though.
Growing Cilantro.
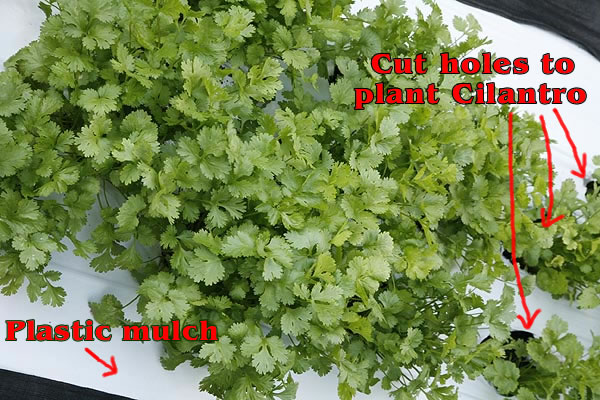
Prepare the chosen area for the cilantro. I like to use a ground cover mulch with holes cut in it. This keeps the weeds down to the small area where the cilantro is growing and reduces the amount of work needed. However you can use all kinds of things to keep the weeds down, several layers of newspaper with holes cut in the right spots will work. A heavy layer of mulch around the desired planting ‘holes’ is also an option although take care that this is not creating warmer ‘wells’ in the mulch as the plants won’t like the heat. Or you can just leave it and pull out the weeds, it’s your choice. Do not use clear plastic, it heats the ground up too much. Plant at least 4-6 nutlets in each patch of ground. Spacing at around one foot apart. Keep the plants watered. This is an ideal use for a soaker hose run between the plants so you can water them every day keeping the ground moist.
Cilantro plants growing in plastic mulch
Harvesting.
Once the leaves have reached the desired size cut the plants down to the ground with scissors or floral snips. This is usually around 8-10” tall (20-25 cm). If left any longer the plants will start to bolt tall stems for flowering and the leaves are not as easy to harvest. Once cut the plants rarely regenerate leaves, they are basically spent and need to be replaced if there is still enough cool weather ahead, if not pull them out and plant something else.
Leaving for seed
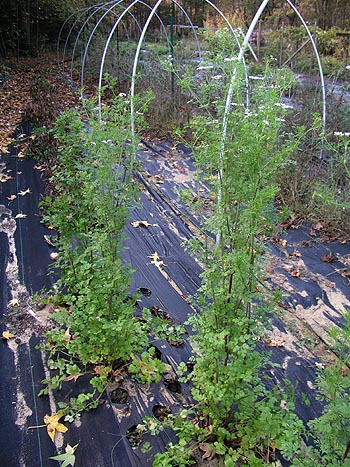
Flowering Cilantro can reach 5-6 Feet in height
If desired leave a few plants to go to seed so you can collect more nutlets for your next sowing or use the coriander in cooking also. Plants can grow pretty tall up to 5-6 feet (152-183 cm) in height so make sure you have space for them. They are really quite pretty delicate plants and make an interesting addition to the garden. Once its gone to seed wait for the seeds to turn just brown, and then cut off the seed heads before the nutlets start to fall. (it wont reseed for next year, they don’t like cold winters.) Spread the seed heads out to dry away from the bleaching sunshine then rub them to remove the nutlets from the stems. This can be quite a fiddly time consuming task which is why most people buy their coriander rather than collect their own. Getting all the stalks out is a real pain. Once you have your seeds keep them in a cool dry dark location for cooking. If keeping for seed its best to store them in the refrigerator for maximum viability.
Cilantro is a strongly scented and flavored herb and is not usually bothered by wildlife but rabbits will sometimes take a bite. This usually means snipping the plant off at the base, then deciding they don’t like it and dropping it. This is extremely annoying. If this happens you may need to put a small fence around your plants.
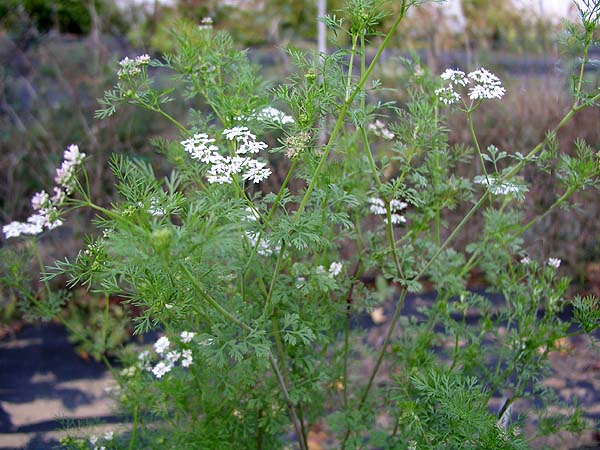
cilantro flowers
Why grow your own.
Well if you are Italian or Indian then cilantro is a major part of cooking. Growing your own is an ideal way of getting your own organic herb since most supermarkets don’t offer organic herbs. Some do but they, of course, not inexpensive.
Cilantro is a great health herb.
Cilantro is the go to herb for helping to pull heavy metals from the body. It’s the main reason that I grow so much of it. I use it myself and encourage my everyone else to use it too. This is especially important if you eat things like tuna, which is known to contain heavy metals especially mercury. Consuming a lot of fresh cilantro on a weekly basis can help pull any heavy metals and possibly other toxins from the body. It’s a go to herb that everyone should use in today’s world.
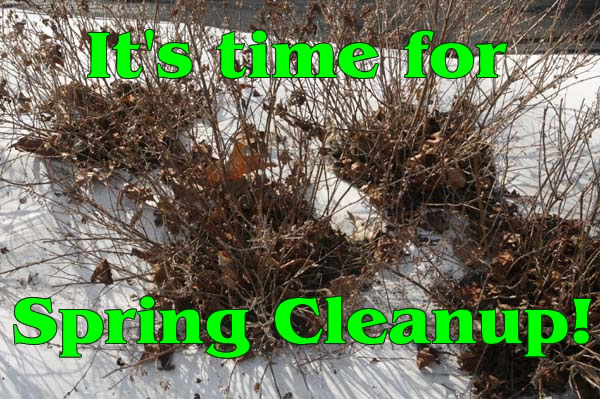
Spring never comes slowly and quietly in the northeast. One day its winter next day the temperatures soar and its suddenly spring. For gardeners and farmers it can be a real pain. One day you are going along fine thinking you are getting ready for spring. Next moment it IS spring and there is suddenly a huge amount to do.
It’s time to get out there and clean up the garden or, for us, the fields.
First thing to do is pruning of any shrubs and fruit bushes before they come too much into bud. This includes all summer flowering shrubs like hydrangea, NOT azalea or spring flowering shrubs or you wont get any flowers. Pruning is a whole separate topic that I will write about at a later date. We have been pruning back our gooseberries, hardy kiwi vines and cutting out all the deadwood on our raspberries. Pruning back hydrangeas and the few other shrubs that were left over from the last owner and I can’t bear to dig out. At this time of the year prune back shrubs that will flower in summer. DO NOT prune ones that flower in the spring or you will be pruning off the flowers. These shrubs need to be pruned after they have flowered. If unsure on a particular plant checking for your specific plant online will usually tell you the best time to prune it.
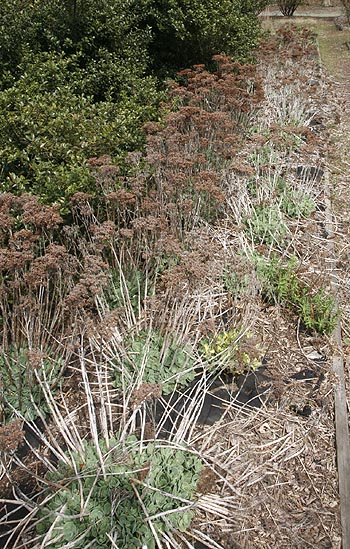
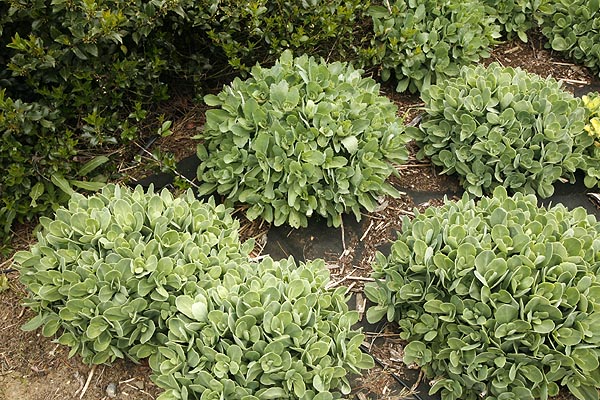
Ice plants (sedum spp.) before spring cleanup
The main project is to get all the perennial plants cut down to ground level before the new growth gets too strong. While it is true that a lot of this can be done in the fall there are many reasons why we don’t do this.
1. It gives overwintering beneficial insects somewhere to hang out. Many beneficials overwinter in hollow stems of dead perennials, if you cut all these down and take them away to the compost heap in the fall then you are destroying all those nice insects that are going to help your garden next spring. Others lay their overwintering eggs or egg sacks on such material and again removing them destroys any hope that your garden can protect itself from aphids and other pests in the coming year.
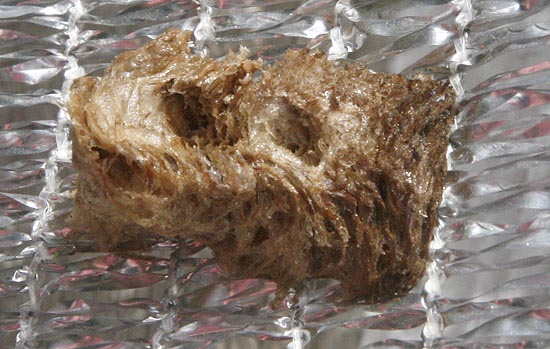
Every year I find many praying mantis egg sacs when I clean up the spring garden. I try to leave these stalks standing or if I accidentally cut one down I stick the stem into another patch of twigs to allow some protection until the babies hatch. Keep your eyes pealed for such egg cases before you clean them away.
Praying Mantis Egg case on silver shade cloth
2. For those plants with seeds remaining like Echinacea it gives the overwintering birds a food source for a while at least. Often they much prefer to use ‘locally grown’ food sources than bird feeders.
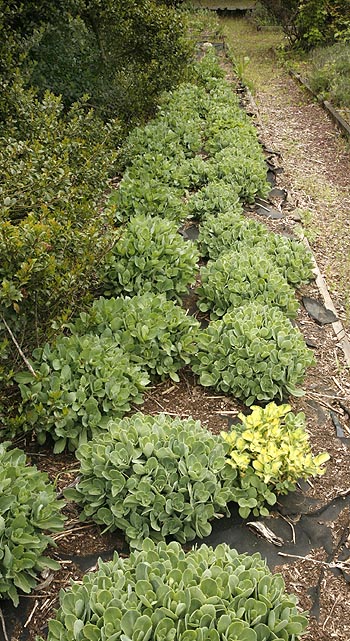
Ice plants one week after winter cleanup
3. It makes the garden look a lot nicer. Cutting everything down in the fall leaves an unpleasant barren landscape especially when its snowed. Leaving plants standing gives a lot of ‘winter interest’ to the garden rather than barren nothingness. It gives the garden a much warmer look even in the winter months.
4. Leaving material until the springtime often makes it much easier to clean up. While in fall the roots and stems of these plants still have some strength in them making it harder to either cut them down or to pull them from the ground. In spring all that resilience has gone and plants can either be pulled out easily or often snapped off at ground level with a hand rather than using secateurs or other cutting blades. I soon discovered that trying to remove okra stalks in fall was a very hard job and that they needed to be dug from the ground. If left until spring they can just be pulled out by hand. Anything that makes my job easier is a benefit as far as I am concerned. Why make more work for yourself.
If you have any ornamental grasses these need to be cut down to ground level to remove all the old dead grass stalks before the new shoots begin to form. If you are slightly late in cutting them down don’t worry, they are grasses after all. They may flower slightly later but that can also be an advantage, it means that the seeds don’t blow all over the yard and seed themselves. This is especially true of Chinese silvergrass which can turn into a menace rather than a delight.
Any leaves that remain from the winter or if you have pin oaks this is the time when they usually decide to shed their leaves, just when you have the garden all nice those leaves come down and make you do even more work! Leaves can easily get caught under low growing perennials such as lavender or hyssop and may need to be removed. Use a shrub rake if you can find one. Its like a leaf rake but thinner so you can get into tight spots. Sadly they don’t often sell them in big box stores or at least not good ones. I got this one in Rite Aid! I would have liked a longer handle but it works fine for what I need.
This year the challenge is getting everything cleaned up before the plants overtake us. The weather is so warm this spring that the plants are shooting up fast making it harder to remove some of the old plant material before the new stuff comes through.
Spring cleanup can be a very satisfying task. There is a great feeling of accomplishment when you can look at a newly cleaned area and see all the progress you have made. Its also great exercise and good fresh air. Just don’t get over enthusiastic. Overdoing it will cause muscle stiffness which you will regret the next day and may keep you from going out again to enjoy your garden more.
Happy Gardening!
Ice plants before cleanupIce plants one week after cleanup. Boy have they grown!