Feeding wild birds in the winter months.

It gives them much needed food and it gives us entertainment.

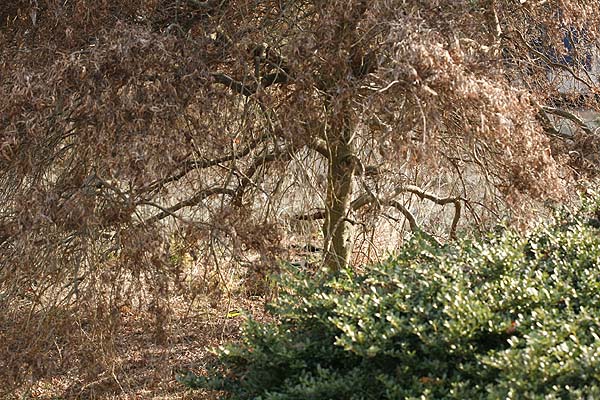
Cold winter days are not popular with many people. Yes there are those who claim they love the cold weather, I personally think they are nuts but heck it takes all sorts.
The snow descends, just like here today, it covers the local world in a blanket of white. Normal things suddenly become beautiful there is a tranquility about it. I can be magical, if of course you don’t have to go out to work in it or clean it up. Just looking at it through the window is a pretty wonderful thing to do.

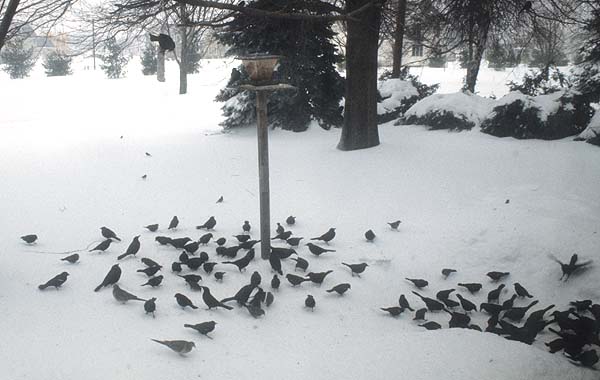
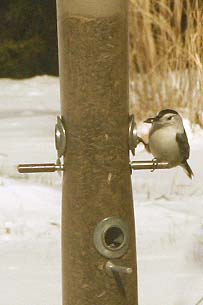
It’s not so much fun for the birds. When the snow comes down it covers up all the possible food sources that they have. It’s at this time that bird feeders are essential for birds, especially little ones who need a lot of energy just to keep from freezing to death. At this time having a bird feeder and feeding the birds can be a very good thing to do. You can save a lot of little lives and have hours of free entertainment as well.

Watching pretty birds at bird feeders can be a surprisingly enjoyable pastime. Even some birds that at first glance may look boring can reveal themselves as quite beautiful when the feathers are seen more closely.

What to feed the birds.
This is going to depend on where you live. Here in North Eastern United States birds will only eat ‘native’ kinds of food. Mostly seeds and suet cakes which are packed with energy they need to keep warm. Wild bird food is available in large sacks from all big box stores, most hardware stores and many other sources. In other areas where it is warmer some birds will also be attracted to fruit and other foods so choosing will depend on the type of birds you want to attract and if they are in your vicinity. Putting out fruit to attract fruit eaters when its snowing is not going to work.

If you live in a city, or parts of Europe birds tend to eat lots of other stuff. Growing up in England my parents fed the birds all the scraps from our table, bread, fat scraps all kinds of things except vegetables. We learnt very fast not to put out fish scraps or the garden was inundated with seagulls very fast (we lived near the sea). We also learned to cut the bread up into small pieces or the rooks would come along and stab a whole bunch of pieces like a barbeque skewer and make off with all the food. My mother loved to feed them mashed potato since they could not scoop up a lot of that in one go. She thought that was delightfully funny. Watching the birds gave them hours of entertainment (remember there was no cable or Netflix in those days).

Large crow picking up as many bread cubes as it can

Here in the Northeast US the birds wont eat any of that, they don’t even eat bread. They will in very cold winters eat lard but they have to be desperate with snow on the ground for several weeks before they even consider it.
If you are just starting out with bird feeding ask others what they find the birds eat. Its no fun putting out table scraps and finding they are still there weeks later. You could end up with rats. Experiment with new materials in small amounts and see if they like them. Even if you are buying specific bird foods is a good idea to try only in small amounts just in case your birds don’t like you offerings.

Platform bird feeder

How to feed the birds.
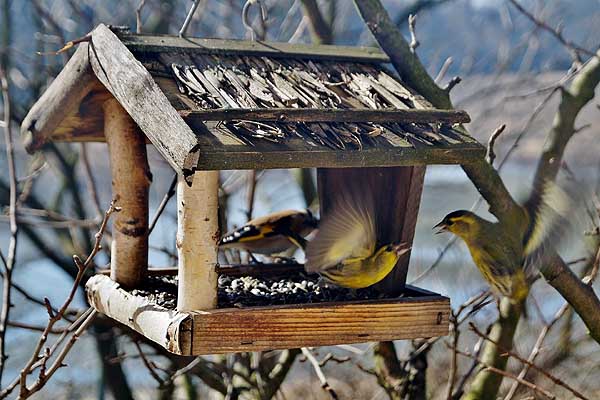
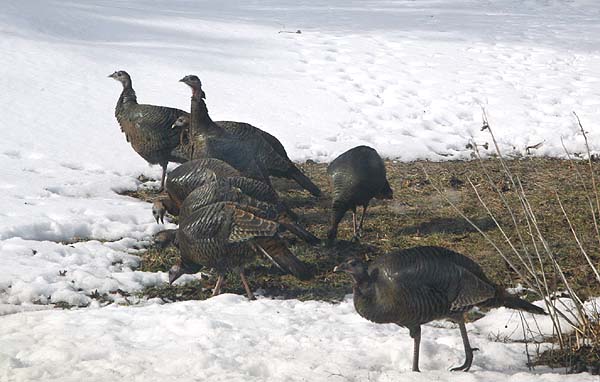
For the most part its good to use bird feeders. Basically they come in two major forms. Long tall cylinders with individual perches for birds and wider squatter feeders with ledges. Both are equally good. Having one of each is even better as different kinds of birds use each kind of feeder. Our hanging bird feeder is used by nuthatches, tufted titmouse, goldfinches, chickadees and other finches. These birds never use the flatter feeder with the ledge, that is frequented by cardinals, bluejays, grackles, starlings, woodpeckers, and many other birds. Dark eyed junko and mourning doves never use either feeder but prefer to feed on the ground and scratch around for scraps that other birds of dropped. Therefore it’s a good idea to have one of both if you have places to put them. Also scatter some food on the ground to allow those birds that don’t like to get up on the bird feeders to have food too. If there is a lot of snow, scrape some down to a solid layer and put the seed there or it just drops into the snow and the birds cant find it.

Experiment with feeders to find the best ones for you. We started with a fairly small square feeder but soon migrated to a much larger one. At our old even smaller farm we were the only house that fed birds so they came from a great distance and we fed a lot of birds. We got fed up with constantly going outside to fill up our small feeder it got to the point where they would eat it out once a day so a larger feeder that we only had to fill weekly was much better.

Some hanging feeders are specialists for thistle seed. This is fine IF you have thistle feeding birds. We tried one in our old location and never got one bird. If they are not in your area then they cant come to feed. Same thing applies to humming bird feeders, if they don’t live in your area then you wont get visitors.

Downy woodpecker on suet feeder

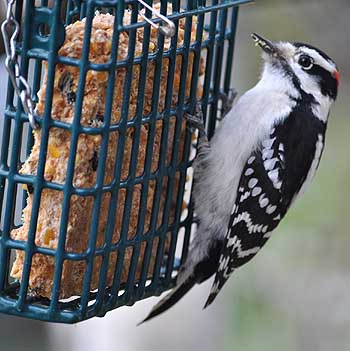
Suet feeders are good if you live in a location where it stays cold for long periods. However if the temperatures fluctuate quite a lot which they are tending to do now the suet can melt and create nasty grease spots on the ground which can be very unpleasant. This can also attract unwanted ground creates like voles and mice to the ground area. We stopped using suet feeders for this reason.

Placement of feeders.
The ideal place is near a window where you can sit comfortably and watch the birds. Having the feeder away from the house where you cant see it defeats the object of entertainment. Lets face it we want to get something out of the deal not just feed them. The joy of watching them is the best bit.
Long cylinders can be hung from hooks under the soffit of the house close to the window. It will take the birds a while to get used to the movement in the house and not fly away every time you move but after a while they ignore it and you can get a really close up view of the birds. It is also more difficult for squirrels to reach feeders in this position. Not impossible just more difficult.

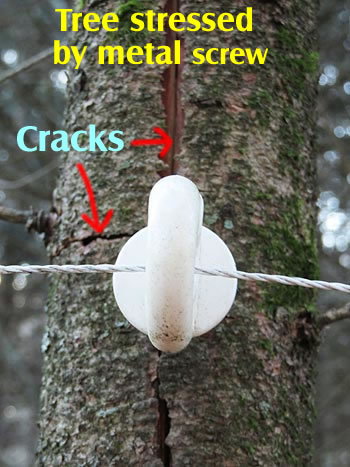
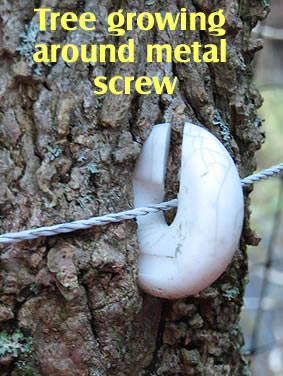
For larger feeders you can either use a pole with a feeder mounted on the top or hang it from a tree. Be aware that feeders full of seed can get heavy so choose a strong branch to do this. Wrap something around wide around the tree branch before you put the rope or chain up to stop the bark from abrading as this can eventually kill the branch. We use an old piece of clothing to pad the branch first. Also be aware that if you put the feeder in a tree many birds will visit the feeder then fly to a nearby branch with their seed and eat it there. Some use their feet and peck the hull off the seed that way. IF they are sitting on a branch the bark of the branch gets pecked too. Over time if they use the same branch it can damage the bark there and you may have problems with the branches dying back.

Where ever you choose also consider other animals that will be attracted to your seed. Mainly squirrels. Squirrels love bird seed as much as birds do and it can be very entertaining watching them try to figure out how to get to the them. I really did not mind the squirrels using our feeder, to start with, but they do tend to eat a whole feeder full of seed at one time and what they don’t eat they throw on the ground so you end up with a pound or so of seed on the ground and nothing in the feeder. It then gets annoying having to keep filling it up. Keeping the squirrels off the feeders and putting other food out just for them (if you want to fee them) is the best option. However squirrels are very clever and will try all kinds of methods to get to the feeders, don’t underestimate them. They will leap for long distances to get to a feeder. Cones on poles to stop them climbing up works very well provided there are not any trees our house walls close by that they can climb and jump from. A friend put a cone on his feeder and his two squirrels spent a week climbing up a nearby tree and jumping on the cone time after time until the broke it.

Squirrel on our hanging bird feeder.  He leapt from a nearby building (fell a lot before he got it right), to the top of the pole, then slid down to get to the food.
Squirrel on our hanging bird feeder. He leapt from a nearby building (fell a lot before he got it right), to the top of the pole, then slid down to get to the food.

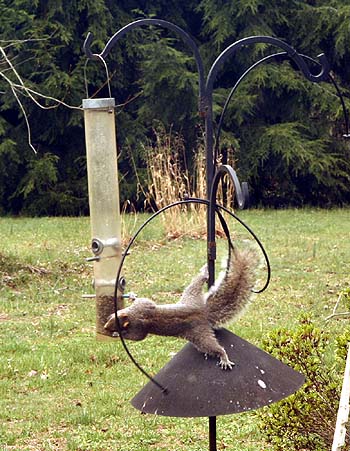
Squirrels will also hang down from branches by their feet to get to feeders. It took ours several months of trying before he figured out how to edge down the roof reach under the eve and down onto the hanging feeder there so he could reach the seed. In the new position on a pole with a cone below it they climb the side of the house and leap out to grab it before they fall.

Thus take care where you put a feeder, anything in a tree will get squirrels. Even if you think it’s a good spot consider that the squirrel is out to beat you. Its always a running battle.

One useful trick is to add cayenne pepper to the bird seed. The birds cant taste it and they don’t care, but most squirrels hate the hot taste and will leave the seed alone. Occasionally you get one that loves the taste of spicy food and will ignore it but its not that common.

Seed debris.
Whatever you put in the feeder you are going to get shells and hulls left on the ground under the feeder. The grass there is going to be scratched up more as the birds scratch for the seeds. The best option is to place it in an area where you are not bothered if you have the best grass then plant a few tough species underneath it, or place it in a flower bed where there are perennials that come up later in the spring. This way the hulls work as mulch and the seed hulls bother no one.

Nuthatch on sunflower feeder in our garden

Types of seed.
We use unhulled sunflower seeds in our hanging tube feeder. You can get hulled seeds but the speed at which those disappear is amazing and we spent too much time filling the feeder up again. Using unhulled ones slows down the speed at which they can eat them. Many people don’t like them because you get a pile of seed hulls under the feeder. We just planted hostas under the feeders. They don’t come up until after the feeders have been removed in the spring and they hulls act as a great mulch. The hostas do well and we get far fewer weeds.

We use mixed seed in the larger feeder. This allows for the birds to get a variety of seeds. However some birds like only one kind. This tends to be things like blue jays who go after the sunflower seeds and will toss out all the other seed to get to them. If you have a lot of blue jays they will empty your feeder fast to get the sunflowers so you might want to mix in extra ones to keep more food in the feeder rather than on the ground.

How long should you feed the birds.
That depends on how much you enjoy watching them and what other wildlife you have around you. If you love that part of it then you can feed them all year. If you just want winter entertainment and to help feed them in the lean times then take the feeders in during the spring.
If you live in an area where there is other wildlife taking feeders in when spring comes is recommended. Don’t leave feeders out if there are bears in your area they will be attracted. Putting feeders up very high to keep the bears off can often help but like squirrels bears are very clever and will figure out ways to get to your bird seed. For the most part its best to take them down. If you have bears make sure any spare sacks of bird food are kept well away from doors and walls in the garage. If you feed seed they can smell the sacks and may try to get into the garage or shed where you are keeping it. Bears are very strong and can be very destructive.
Also be aware that during warmer months many other animals are active so bird feeders may attract other visitors. Mice and voles will come and eat the seeds under the feeders as will raccoons although they tend to come at night they can often be easily seed especially during a full moon. If your feeders are close to the house you may not want to attract such animals so taking them down in the summer is again recommended.

If you have bears don’t use humming bird feeders either unless you can get them above the height a bear cant reach it. A bear will completely destroy a feeder when trying to get at the sugar syrup.

Grow other food sources during the year.
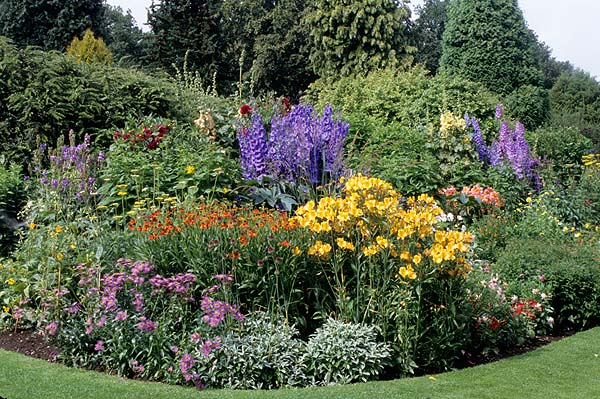
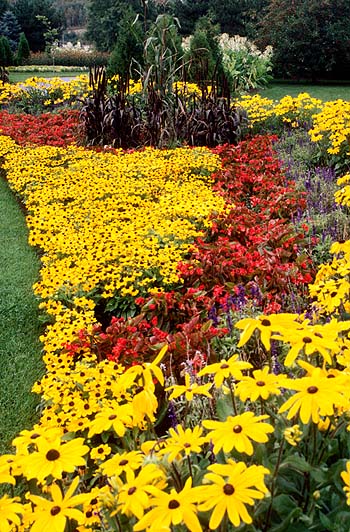
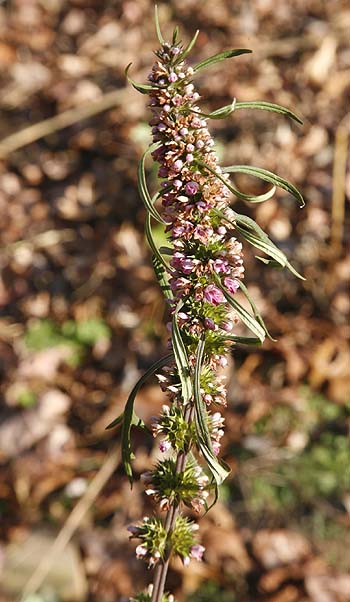
While birds will eat seeds during the winter months virtually no bird feeds seeds to their young chicks. They use caterpillars, insects and such like. So having a diverse garden with many different plants that attract insects will increase your bird population and give them other things to eat. Growing plants that pollinators and other insects like to use is helpful. Growing plants that produce seeds that birds love to eat will also attract them to your garden. An example is Anise Hyssop, the goldfinches love the seed and often our rows are so festooned with the bright yellow birds that it looks as if the plants are covered in yellow flowers. Providing seed in the garden is a much better way to feed the birds naturally than at a feeder during the year and since they are spread out it does not attract other pest such as mice to the feeders which can happen in summer months.
We had a nest of tent caterpillars in a tree near our patio one year which I intended to remove but never got to it. Once the caterpillars broke from the nest they infested our patio plants, not to eat them but to pupate. However a pair of blue jays spent days picking every single pupa from all the plants on our patio, there were dozens of them but the happy birds found it easy to locate them. Thus they had lots of food for their nestlings and we had a pest free patio.

Join the world Counting birds this February

Be a citizen scientist for up to four days and have fun doing it.

The Great Backyard Bird Count is coming up soon February 17-20 2017.  It’s your  opportunity to join with people from around the world to look at the bird populations everywhere.

You can count those at your own bird feeder or for the more ambitious you can travel around and count birds in may areas.  Many people get a group together and make a day of it.  You can even have a competition between local groups and see how many different sightings you can achieve in one day or over the four days of the event.

Launched in 1998 by the Cornell Lab of Ornithology and National Audubon Society, the Great Backyard Bird Count was the first online citizen-science project to collect data on wild birds and to display results in near real-time.  It was later joined by Bird Studies Canada when bird enthusiasts from Canada started reporting their own sightings.  Every year the number of reports has been growing and in 2013 it went global with countries all over the world now reporting on bird sightings.

The Great Backyard Bird Count website. gives detailed instructions on how to count birds and how to enter the data into the citizen science database.  It’s a great activity to people of all ages and an wonderful family event that everyone can enjoy.

It’s traditionally held in February because the three science groups wanted to create a snapshot of the distribution of birds just before spring migrations ramped up in March.  After the event went global in 2013 it gave them a much richer and detailed snapshot of birds wherever they are in February, regardless of seasons across the hemispheres.

Check out their website if you are interested.  Plug in your area and they will even give you a checklist of all the birds that you are likely to see in your area.  All you need to do is count how many and add it to the checklist.  Then when you are all done enter it into the database.  It’s fun to watch their real time map light up with little dots as people all over the globe enter their data and it gets pinned on the map.  They also have a bird photography competition for the more ambitious, so don’t forget to take your camera along when you are bird watching.

Giant flock of grackles at our farm

So start thinking about it now and plan out what you want to do.  If your climate is mild making a day of it can be really fun.  Pick several different locations to visit and see how many different birds you can find.  In colder locations a little more enthusiasm may often be needed but it can still be a rewarding and different family or group event to participate in.  Some organizations offer group trips or location suggestions where you can go and view birds.

Our own Master Gardener group organizes such a get together at our local park where birds can be spotted.  I don’t go because I can see more birds on my farm than they have in the park.  I do the backyard bird count every year in honor of my cousin Peter Ryder.  He was a great bird enthusiast and would have loved to participate in this venture but sadly he died of lung cancer before this event went global (he lived in England).  However I like to keep his memory alive with this event.

More and more scientists are beginning to realize the power of the citizen scientist and realize that everyone has something that they can contribute that can be very valuable.  After all you don’t need a degree to count birds people have been doing it since the stone age.  So whatever you choose counting through the window from your living room armchair  or out for a day trekking join in the fun and become a scientist at least for one day.

Winter is the best time to plan your summer garden.

What you need to know before deciding on which seeds to buy.

Its cold and maybe snowy outside. There is not much chance of getting anything done in the garden.
But this is the BEST BIT.
Now you get to decide what you are going to grow this coming year.

There are several ways of going about this.

1.
Decide exactly what you want to grow, then go and find the seeds (or plants) for it.
2. Have a general idea then browse the catalogs to find things that fit your theme or idea.
3. Have no idea so browse catalogs and online to find thing that take your fancy.
4. Combinations of the above.

I have to admit that 1 and 2 are what I do but occasionally something else comes up in my wanderings across the internet and I add it to my list of things to grow.
Whatever your choice winter is the best time to do this. You can curl up with a catalog, or browse online in your favorite way. Check out all the great plants that you could grow and make your choices.

It’s a great way to spend the winter afternoons. Or all day if you feel like it.

There are a few guidelines that you should work with however when choosing your seeds and plants.

1. Where are you going to put them?
This tends to be the biggest problem for a keen gardener who wants all kinds of plants but then finds there is not enough room to fit them all in the garden. Heck I have an 8 acre farm and I still have this problem. I think I would still have the problem if I had 40 acres. You tend to expand to fit the space you have.
Plants also tend to take up more space than you expect them too so plan for less and then they can grow into it.

Shorter garden border. Still taller in center and shorter on the outside.
Mixed garden border. Taller plants in the center and shorter on the outside.

2. What is your climate?
This is really one of the most important factors. You cant grow tropical plants outside in Northern latitudes and you cant grow cold loving plants in warm southern latitudes. There are always exceptions. If you have a heated greenhouse then of course you can grow tropical plants in cold areas, you may also be able to grow them as annuals if your summers get hot enough. However if your summers are cool then picking something that likes a lot of heat is never going to work for you. Picking a plant that likes cool climates wont work in Florida or a tropical country either.
Always know what climate zone you are in. I will have an article on climate zones later this week so check that out if you are unsure what it means. There is a lot more to a zone map than just hardiness of plants.

Make sure you check your heat AND cold zones. This is very important when choosing plants. If for example you are zone 6 then trying to grow a plant that liked zone 8 is not going to work for you. Most seed catalogs will show the zone that the plant is hardy to. Annuals usually don’t have zone listings since its expected that the plant will die off during the winter anyway. However if an annual likes hot weather you still need to make sure that you have enough heat during the summer to grow it well.

Plant Hardiness map of the United States.

3. Know your soil type.
Quite a lot of plants will only grow on certain soil types. This is why when you travel to a different area you will find plants that you don’t see around your own home. Sometimes this may not be very far at all if the soil or rock type changes dramatically. There are many plants that will only grow on limestone and chalky soils. If you don’t have this type of soil then the plant will not survive unless you import soil specifically for it. The same is true of many other plants. Some like rich loamy soils, other like sandy soils some even like clay and waterlogged soils.
If a plant you are trying to grow is not doing well, do a little research and check out the soil type it prefers. It may well be that you are trying to grow it on a soil that is not suitable.
Many good seed catalogs will tell you what kind of soil the plant prefers. We always ensure that the plant seeds we sell state the preferred soil type. Trying to grow something on a different soil type might work but its not going to be as happy and healthy as the type it really prefers. So when choosing plants try to pick those that will work with your soil type.

Sandy loam soil.
Sandy loam soil.

4. What kind of sunlight do you have?
If you have full sun most of them time then your options are pretty wide. If you have a lot of shade then your options are more limited. You can still create a wonderful garden with shade but its going to take a bit more work, at least to start with. Check what kind of light a plant needs before you choose it. If you don’t have a lot of sun picking sun loving plants is going to end in disaster. If you put a shade loving plant in the sun its also going to end up dead. So determine what areas you want to plant, and what the sunlight levels are before you start. All catalogs will tell you how much sun a plant needs. Don’t ignore this its there for a good reason.

Shade loving plants growing under trees with lovely moss front border.

5. What kind of height do you want?
Some plants can grow very tall, others are very short creeping groundcovers. Make sure you know what your chosen plant is going to do. It’s a nasty surprise if you put in a plant thinking its going to be short and find it grows to 6 feet in height! Plant descriptions usually tell you how tall they will grow. If it does not then check another source until you know for sure not knowing can cause a lot of trouble in the garden later on. If creating a border then you will most likely want some that are fairly tall for the back, some middle height for the center and short ones for the front. Check out any professional garden border or photo and you will see this arrangement.

6. Decide what kind of plant you want.
Do you want perennials or annuals? Since were are talking about seeds here I will stick to those and talk about shrubs and trees in another article. While these can be grown from seed, and often are, its not the most common seed choice for gardeners

Perennials take longer to establish but then you don’t have to plant them every year, you just have to maintain them and divide them when they start to outgrow their area. However perennials tend to flower for short periods of time, the rest of the time you just get leaves.
Annuals you have to plant every single year which is more work. However annuals tend to flower profusely for much longer periods of time giving a lot more color and show.
Most people go for a mixture of both for the best results.

Bright annual border gives huge color impact but needs to be planted every year

NOW MAKE YOUR CHOICES.
So now you have a good idea of how much space you have, what kind of soil, sunlight levels and climate zone you are in. Now its time to pick your plants. This can be the hardest part, there always seem to be so many interesting plants that you want to grow and not enough time or space to put them.

Best option is to make a list of all the plants you have found that you like. How you organize this is up to you. Me I tend to open a browser tab for each plant, use post it notes in paper catalogs and make a paper list. The list is always long, much longer than I have space for.
Then comes the hard part. Cutting down the list. Crossing off the ones that you cant have, Noting the ones that you cant live without this coming year. Cutting the list down until it’s a reasonable size and the cost is not overwhelming.

A FEW THINGS TO CONSIDER WHEN CHOOSING.
1. If you are picking a plant for a particular reason say a herb that you need for health, then of course it should come top of the list.
2. Things that have really taken your fancy or you have seen and loved should be next.
3. There is always next year. You may need to make a second list of ‘what I will buy next year’ if you don’t have room for everything this year. Of course this will change next year but it gives you a foundation to work on.
4. Cross off anything that you can live without this year.
List of plants.

5. Make sure that you choose MORE than you think you will be able to grow. The reason for this is that not everything ever goes as planned. Some seeds that you buy may not germinate, others may do poorly or you may have a disaster, perhaps one set accidently did not get watered and died. Having grown plants from seed professionally for over 25 years I find that this happens to me a lot more than I would like. Sometimes plants just don’t thrive or a rabbit gets in and eats a whole crop row down to nothing. Now suddenly you have a large hole in your garden having some extra plants of a different kind to quickly fill the hole up is a lot easier than either having a large gap or having to run to the garden center and find something, which of course will cost far more than if you raised it yourself.

6. Don’t be afraid to experiment. Seeds are inexpensive compared to plants. So go ahead and try something new. IF it does not work out move on to something else. Gardeners are forever experimenting, trying new things and learning. Growing more plants that you have room for is far better than not growing enough and staying safe with a few plants from the garden center. So go wild, order lots of seeds and dig in. It’s a inexpensive way to enjoy life and its healthy for you.

Keep your garden cheerful in winter with silk flowers.

Brighten the dull season and add more cheer.

Lets face it winter can be pretty bleak. It’s cold, there are no leaves on the trees the plants are not growing. Garden cleanup is as finished as it can be with cold weather upon you. But looking out the window can be depressing. All those lovely flowers have gone.
Well they don’t need to be.
Every summer I have a lovely patio area outside my kitchen window that is bursting with blooms it’s a delight to look at. In winter not so much, its bleak and cold. So fix it.
Adding a few pots of silk flowers can really cheer up the area. Now every time you look out the window there is something bright to look at it brightens up the winter months until spring brings the green back to the world.

Patio area in winter looks dull, depressing and uninviting

The great thing about it is that its easy to do and not very expensive.

All you need is.

  • Empty plant pots. Keeping the ones you got the plants in from the garden center or big box store is always a bonus.
  • Some stones from your garden. Hey who doesn’t have those. Now you actually have a use for them!
  • Some silk flowers. Get them in the dollar store. Its not necessary to use expensive ones just something bright.
  • A can of ‘Great stuff’.Optional- some wire to put through the bottoms of the pots.
  • The wire option can be very useful if you are intending to put the pots onto wire shelving or somewhere else they may fall off easily and could be wired into place.

WHAT TO DO.

1. Buy a bunch of silk flowers from the dollar store. The ones that come in mixed bunches on the same stem are the best option as they need less work. However they are not always as easy to come by these days. Whatever have great time choosing as many silk flowers are you like. Its best to pick a few more than you think you will need as its much better to have too many that not enough.
Suggestion. Don’t pick Christmas flowers. It’s tempting just after Christmas to pick all the cheaper Christmas stuff but these flowers are going to be out there until spring. It may look great in December but it looks dated by March. A little holly and maybe one or two poinsettias is OK but for the most part pick spring and summer flowers. You will be happier in the long run.

Can of "great stuff"
Can of “great stuff”

2. Buy a can of ‘Great stuff” See if you can determine just how much you will need for the number of pots and buy a can the right size. Great stuff IS great BUT once you start using a can of it you have to use it all in one go. You cant leave some for later. Once started it works fine but left it sets in the can and is of no further use. So you don’t want to use half a large can when a full small can will do.

Plastic flower pot saved from earlier potting out

3. Sort out some old plastic pots to use. The plastic pots that your last purchase from the garden center or big box store came in is perfect. Use only plastic pots NOT ceramic. They have to stand up to the cold and fluctuating temperatures. Plastic will do this fine. Ceramic will crack over time. They are also more expensive and you don’t want to waste them.
Pick pots that are not too big, unless you intend to do a large planter. Smaller pots are easier to work with and to fill with silk flowers. Pots need to be full of flowers to do their job properly so smaller pots are better. I used 5” (12 cm) pots.

4. Go find some stones. Stones are essential to keep the pots anchored. Pots need to be heavy if left outside or they will blow away in the wind. The heavier you can make a pot the better. So go out and collect as many larger stones as possible. Some people collect up stones from their garden and put them in a pile. Now that pile is finally useful. If not then a scavenger hunt around the garden will be in order. Use larger stones Make sure that they cannot escape through the holes at the bottom of the plastic pots. If stones are that small discard them.
DO NOT use soil! It’s tempting but the great stuff will not bind the soil together and it will leak out the holes at that bottom of the pot as it dries out. Pots can leak soil for years. Trust me I made this mistake with my first set of pots. Don’t make my mistake leave the soil on the ground and use stones.

For those in warmer areas, or if you have had time to plan in advance. You can use concrete to do this job. However if you left it too late and its cold the concrete will not set. Also it’s harder to keep the flowers in the correct upright position until the concrete sets. Thus “great stuff” is the best fast option.

5. Divide up your silk flowers. Decide which flowers are going into each pot and divide them up. If you are intending to do a large planter then it would be best to determine how the flowers will be placed before you begin. Plan out which flowers go where. There will not be much time to change your mind when you start working so figuring out your layout beforehand is essential.

6. Wire. If you are going to put your pots onto wire shelving or in an area where the pots may easily be knocked off then using wire at the base to keep them in position is a good plan. Use a thicker gauge wire. That found in wire coat hangers is ideal. If you have wire ones from the dry clearers perfect (another good way to recycle and reuse). If not buy as spool of similar gauge wire from your local hardware store.

NOW TO BEGIN.

1. OPTIONAL. If using wire cut the wire into lengths depending on the width of the pot and how much you need to wire it down. Usually a 24-36” long piece is ideal. If using a coat hanger cut the looped piece off the top of the hanger and flatten it out.
Thread the wire through two holes along the bottom of the pot. In one side out the other. Make sure that the pot is centered on the wire.

flower pot with stones in it
Fill pot to 3/4 with stones

2. Fill all the pots with stones to about ¾ of the way to the top of the pot. Shake the pots or tap them on the work surface to ensure that the stones are settled well in the pots you don’t want them shifting later.

3. Lay out your flowers ready for each pot. Know exactly what you are going to put where. Check that they will fit where you want them in the pot of stones and cut down the wire stems if necessary.

4. Get your can of “Great stuff” put the thin nozzle on the end and get the can ready to go. If you have not used this stuff before be aware that it will foam up and expand a lot once its in the air so take is slow when using it until you get the hang of it.

5. Stick the nozzle down amongst the stones and gently press the top. The idea is to get the great stuff to stick the stones together. Work it in from several angles using just a little. Once the stones are in place add a little more on the top to fill the pot up almost to the surface.

silk flowers in pot with great stuff
Great stuff fills the pot and hardens quickly around silk flower stalks.

6. Quickly place your silk flowers in the pot and hold them in place. Great stuff sets fast so you will only have moments to do this arrange the flowers as you want them to appear. Remember you can always bend the stems around once they are set in place.

7. Move on to the next pot and repeat the process until you have finished all the pots. Work each pot from start to finish as you wont have long before the “great stuff” sets.  Don’t take too long on each pot or the great stuff can stick in the can and become useless.

8. Once all the pots have set you can bend the flowers around to cover the great stuff in the pots and make the flowers look their best.

9. Place pots around your garden outside your windows where you can see them when you look out and brighten your winter.

winter_patio_silk_flowers
Patio decorated with silk flowers looks much more cheerful for winter months. These pots are wired in place or the blow off in strong winds.

When spring comes pots can be taken in and stored until next winter. Once created these silk flower pots will last for years. My first set lasted me ten years before they finally broke apart and had to be replaced.

OTHER TIPS.

1. Don’t put pots under downspouts or other areas where lots of water will runoff the roof. The water tends to drop on the plants and freeze then you get silk flowers encased in ice. They don’t last as long this way.

2. If pots are placed in a precarious position or on shelving wiring them down can be an excellent idea. Strong winter winds can lift up pots that you thought were heavy enough and blow them away. Its not fun having to chase them around in the dead of winter. Also if you have pets that might knock them off wiring down might be prudent.

3. If you choose to make a large planter remember first that this is permanent. Once the great stuff is in there you can’t take it out so don’t use a favored planter that you want to use again in summer. If you do want to use a favored planter then choose a separate pot that is just a little smaller and put your display in that, then drop it in the planter. It can then be taken out in spring and replaced until next winter.

4. If using a large planter not as many stones will be necessary. If you fill it with stone you won’t be able to pick it up and move it later. However still don’t use soil as the great stuff will not bind to it and it can cause the display to break up.
A good way to fill a planter is to use layers of polystyrene packing chips or chucks of polystyrene packing that came you’re your last purchase. If doing this test the “great stuff” on your chosen material before you start some products will react with it and may dissolve. DON’T use starch packing chips they will certainly dissolve.
Mix the material with stones and bind it together with the great stuff. Work in layers until you reach the top of the planter. Make sure you use enough stones to give the planter enough weight that it wont be blown over by strong winds but still light enough for you to carry around.
Make sure you experiment with the flowers and decide how you want them arranged in the planter before using the great stuff. You won’t have a lot of time to work once it’s out of the can before it sets.

Let your artistic side roam free and create some bright interest for your garden this winter.

Don’t throw out that Poinsettia

It’s a great all round house and pot plant.

Poinsettias (Euphorbia pulcherrima) are ‘THE’ plant for the holiday season. Their bright red, pink or white flowers bring color and cheer to the home. Some Poinsettias can be huge and give a lot of ‘bang for the buck’ The make great centerpieces, table decorations or even placed on the floor. However after the holiday season is over most Poinsettias end up in the garbage bin. This is a very sad end to such a wonderful plant.

To begin with if you buy a good poinsettia from a reliable source then the color in the plant can last all the way through winter. Don’t throw it away if its still adding color and brightness to your home. If cared for Poinsettias can last for years and years as house plants and be placed outside during the summer months. They make wonderful green plants and are very easy to care for.

BUY FROM A GOOD SOURCE .
Choose your source wisely.  Many garden centers have wonderful poinsettias during the holiday season and they are usually well cared for.  Plants offered at supermarkets, big box stores or roadside stands often have poorer quality plants or ones that have not been cared for properly.

Portion of the Poinsettia trials at Rutgers University.

TAKE CARE WHEN BUYING AND TRANSPORTING YOUR PLANT.
Poinsettias are semi tropical plants. They grow well outdoors in places like southern Florida and Hawaii. They don’t like the cold. IF a poinsettia gets cold, even for a short time it will suffer and it wont last well. This is why it is extremely important to make sure you buy from a good source. One that has ensured that the plants are well cared for, that they are kept warm and don’t get any sudden cold shocks.
With big box stores plants are often loaded onto rolling carts (we have all seen them) then maybe left on the loading dock or the unheated stockroom for hours before they are brought in and placed on display. These plants can loose their leaves quite fast and will not last during past the holiday season if they last that long.

When purchasing make sure that the plant you choose is not located near a entranceway where it will be subjected to cold breezes when the doors open and close. This can be detrimental to the plant.

If you do want to keep your plant alive and well, picking one that has been dyed blue or covered in glitter is not a good choice. These poor plants are already subjected to a lot of stress. Glitter is going to badly affect the way the plant can make food and energy. It might look good but its not good for the plant.

Once you have your plant get it home quickly. If it’s cold make sure the plant is wrapped in a bag to protect it on its journey to the car. Don’t leave it in an unheated car for any length of time.

Luscious Pink Poinsettia
Luscious Pink Poinsettia. Part of the Rutgers Trials.

PLACING YOUR PLANTS IN THE HOME.
For short periods of them during the holiday season Poinsettias can be placed anywhere. However if they are close to outside doors where they will be subjected to drafts they will not survive as well as ones that have a warm location.

After the holidays are over move your plant to a more sunny location away from cold drafts. Keep it moist but not wet at all times. Feed it once a week. That’s it. Most plants will keep their red leaves for quite a long period, usually at least two months. I have had some that did not drop their red leaves until spring.

AFTER CARE.
When summer comes the plants can be placed outside in a sunny location. Keep watered and they will reward you with lush green foliage. They make wonderful deck plants. Poinsettias can be cut back to keep them busy. However don’t cut the plant back all at one time as it can shock the plant too much. When cutting plants make sure you wear gloves, thin plastic ones are suggested. Poinsettias exude a sticky latex that some people find causes skin irritation. Bring the pots back into the house for the winter season.

Don’t eat poinsettias or let pets chew on them, the latex can be poisonous.

Portion of the Poinsettia trial at Rutgers University

FLOWERING.
The red ‘flowers’ are of course not really flowers but red leaves or ‘bracts’ the flowers are those little insignificant yellow things in the center. Poinsettias need a specific light/dark cycle before they will flower. It s long days and short nights, which of course is not what we get at Christmas. So don’t expect your Poinsettia to flower next Christmas, it wont. Its going to flower in the summer. Most likely not until the second year you had it since it was forced to flower out of season for the first year. If you have ever driven past a greenhouse all lit up at night before Christmas, this is why. They have to extend the daylight hours to get those Poinsettias to flower for Christmas. Its not natural but its what we want. So unless you can sneak your plant into the greenhouse or put a lamp on it before the holiday season enjoy its flowers in the summer and appreciate its lush green leaves in the winter months..

Take care of your trees when putting up Christmas lights.

Don’t put holes in the trees it can cause great harm.

Tree lit for Christmas Season
Beautiful tree lit for Christmas Season

Christmas is here again, and its time to put up all those wonderful Christmas lights that make the season so endearing. Not of course as much fun for the person out in the freezing weather trying to string up the lights.

When putting up your decorations do consider the trees too. Its not that much of a Christmas present for them if you start putting nails, screws or other nasty sharp objects into them. Mostly we don’t think twice about grabbing a nail and thumping it into a tree but it can cause a great deal of damage to some trees. It can even, over time kill the tree.

The bark of the tree is like its skin. If someone stuck you with a sharp object I doubt you would love them for it especially if it was just so they could hang a few decorative lights on you. If your skin is pierced you can get infected. Its why we wash cuts, put Neosporin or some other disinfectant on them and put on a bandage.

Trees don’t have that luxury. They get a hole stuck in them they cant do anything to help themselves. Often the person could be using a nail or a hook that has been hanging around in the garage for goodness knows how long, kicking around in an old box. Heaven knows what’s on the thing but its certainly not clean. Now all the junk is in the tree.
When you nail into a tree you go through its ‘bloodstream’ so any infected particles can be quickly transported to different areas away from the original site.

Tree cracked by having metal screw forced into it.
Tree cracked by having metal screw forced into it. This tree is dying.

Also the bark is now penetrated and other infections can get into the wound. During the summer months most trees can produce more sap (their blood) with their own brand of antibiotics and try and fight off any incoming infections but during the winter months their system is pretty sluggish so they can do much to stifle the wound.
Even if you take the nail or hook out after Christmas – which most people tend not to do – the wound is still there. Come spring when more diseases start waking up there is an open wound to allow them to enter the tree.

Some tree species are stronger than others at dealing with this. In many cases conifer trees can be more susceptible to disease. Maples are less likely to succumb as their sap rises early and contains antibiotics that can help to kill any problems. This is the reason that maple sugaring is able to take place. Although good maple syrup tree tenders do try and keep their trees clean and free of diseases during the summer months and the taps they use are always disinfected to reduce or eliminate infection before they are used.

Tree growing around metal screw
Tree growing around metal screw in an attempt to keep out infections.

Often trees with high saps or gums can cope very well and often will actually grow around the nail or hook if it is left in the tree. This is not only because the tree is growing but because its trying to protect itself and seal the hole that has been created.

In many cases a wounded tree can eventually die. It may take several years but once its compromised then all manner of diseases and insects will turn up to colonize it. In most cases boring insects, ants and other tree attacking insects wont harm a perfectly healthy tree but they will quickly find those that are sick or fighting off some infection and attack. Now suddenly the tree is not just fighting off one little nail hole with a few organisms it dealing with a whole bunch of different things. The tree cant cope with that, it struggles and tries but in the long run it usually looses the battle.

Introducing diseases into trees by making holes has always been a problem, it has never been too serious in many areas. For the most part trees are used to losing a branch now and again or being scraped by animals. They do have some immunity. However in the last decade or so we have seen a great surge in global commerce. Goods are being brought into almost any area from all over the world. Along with those goods come diseases from other countries, either in the wooden packing crates, packing material or just as a dusting on some goods items. These new diseases and insects like their new environment and find trees to their liking that have no immunity to these new invaders. Such diseases can quickly infect wounded trees and in some cases kill very quickly.

So use string, wire clips, anything that does not penetrate the tree bark. If you are hanging something from a branch that will blow in the wind put something around the branch to ensure that the bark does not get rubbed off. Pieces of old hose pipe are often excellent for this job on small branches. Larger ones may need sections of cloth or whatever you have on hand to protect the tree.
If you value your trees don’t put holes in them. Keep them healthy and happy this Christmas season.

Water Your Shrubs Before Winter Sets In.

It will help them survive and be happy in spring.

Its very common to have people call me in the spring because their landscaping shrubs or trees are not doing well. As spring progresses the poor shrub looks sicker and more unhappy. The usual statement is ‘it was fine last year, now this spring its not’.

The most common reason for this problem is because the plant was not given adequate water before the winter set in. This is especially true for evergreen shrubs but can affect any shrub or small tree. It is vitally important for new trees and shrubs that have been planted this year or last year. Let’s look at the problem.

Plants are like people. I tell everyone this all the time. If you think of a plant like a person and treat them the same way then you have a much easier time with plant care. Even though plants are built to like sunlight and use it for food they are just as susceptible to the heat from the sun and the burning rays are we are. Plants however cant just pick up some sunscreen and slather it on like we can, and they most certainly cant get up and move to a better location.

What plants can do is sweat. Yes plants sweat just like we do. It’s the way they keep cool and keep the damaging rays from the sun at bay. To do this they have to have water. They keep some of this water in their roots, stems and leaves but the reserve supply is in the soil. IF the soil dries out the plant cant get enough water to sweat, so it wilts, at least in summer it wilts.

Holly bushes in winter
These Holly bushes are in full sun facing south. They will take a lot of sun during the winter months.

Winter is a bit different. While its cold in the winter for a lot of the United States its still sunny. This sunshine might not produce a lot of heat during the winter months but it still produces some and the damaging ultra violet rays are just as strong. If the temperatures are reasonable then the plant can still get water from the soil and most often its fine.

However if the temperatures are very low the ground freezes. There are many many days when we have snow on the ground but bright sunshine. We all know what that’s like, we need sunglasses to keep the glare down. It can even be quite warm during those sunny days but not enough to melt the snow and unfreeze the ground.
Now that poor plant is standing there in the bright sunshine with reflected glare coming off the snow covering and it does not have any sunglasses to put on. It tries to sweat, if it has managed to collect enough water in its ‘body’ (roots stems and leaves) it can do this. If it runs out it will try and suck it out of the ground, but when it sucks on that straw its blocked because the ground and the water in it is frozen so just like you sucking on a straw that blocked it cant get anything. So it suffers.

decidious shrubs in winter
Although these shrubs have lost their leaves the stems will still take a lot of sunshine during the winter months.

If this happens quite a few times during the winter months the plant gets very stressed. Imaging being out in the cold glaring sun getting hot and having nothing to drink, you would not like it much either.
For the most part the plant does not show these signs of stress until the spring comes. Then when new growth should be bursting out of those buds and perhaps flowers forming the poor plant is exhausted. It does not have the strength to make new growth or even recover from the stress it had over the winter. This is when you start to see the problems in the plant. However in many cases its now too late to help. The plant is just too exhausted to go on.

This scenario can be prevented by making sure all your plants get a good amount of water in the late fall and early winter months. Don’t just stop watering them because the weather gets cold. Even if the leaves are falling off the trees if its not raining much then water those shrubs. The need to have a good water reserve to get them through the very cold, frozen months and come through in spring as a happy healthy plant. What you do in the fall and early winter can make a massive difference to how healthy your plants are in the spring.
This is especially important to shrubs that are usually shaded by deciduous plants during the summer months. In the winter all these leaves are gone and the plant is subjected to the full force of the sunlight without any protection. Its going to get a much higher dose of light than it would during the summer. Even if the plant is now just stalks and twigs with no leaves its still has to endure the ravages of the winter sun. Giving it as much help as possible will ensure it’s a happy healthy plant next spring.

So don’t put the hose away if the temperature falls – although you might want to bring in the watering end overnight to stop it freezing. If you have many days of cool but not freezing weather with sunshine and no rain then make sure you water those shrubs and small trees. Large mature trees can usually take care of themselves. Water everything at least once a week and give it a good soak not just a few sprinkles, keep doing that every week until its just too cold or the ground freezes up. Your plants will love you for it.

Its Early December. What’s still flowering?

Some still bloom while most are bedded down for the winter.

The weather is still unpredictable here in New Jersey. One day its 45°F the next its 60°F and raining. Yesterday I took a walk around the fields to see what was still flowering, not a lot its true but there are still a few hangers on.

Tansy flowering in December

The most obvious is the Tansy (Tanacetum vulgare). Its bright yellow flowers are still standing proud on many of the shrubs. Not as many as it could because most of it has been harvested, but there are still some bright yellow spots around the field which can be seen from a considerable distance away. To these cling the few remaining small pollinators that are still tough and courageous – or perhaps desperate – enough to be out flying.

Siberian Motherwort flowers in December

The other big flowerer is the Siberian Motherwort (Leonurus sibiricus). Its tall stems are still festooned with flowers that are attracting pollinators. While its not easy to see the flowers until close to the plant the flowers are there in large numbers. This plant is scattered around the fields and in some places its still producing seedlings that are making buds and trying to flower. It’s a tough plant and does not die down until a strong killing frost. Although a few that were located right in the middle of the open field have wilted quite a bit in the biting winds we have endured over the last week. The ones out of the main wind blasts are doing fine.

December Rose
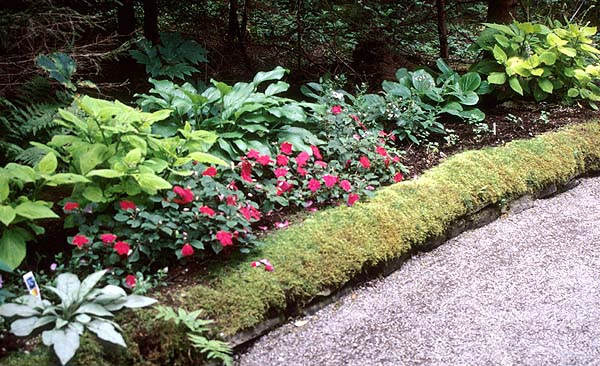
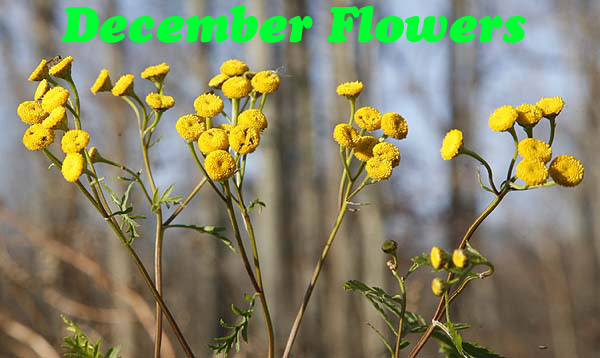
Finally the knockout rose bushes are still blooming. Its hard to find a tougher rose than the knockout and even though its not a true herb its such a beautiful flowering plant and its so tough its hard not to find a corner for at least one bush. We have several in our formal lavender garden and they flower from mid spring right up until killing frosts. Plant one where you can see it from your most used window, it will brighten your day.

Choosing some plants that will flower very late into the year and hold out against the milder frosts can be very important to a garden. It helps and insects that need late nectar and it give you some bright flowering spots in an otherwise gloomy and winter garden. Tansy and Siberian motherwort and tough little cookies and certainly worth a spot in any garden to hold off a little longer the coming of winter.

The Great Pumpkin Splat!

Things to do with pumpkins

Halloween is over, what do farms do with all the pumpkins that are left? One thing to do is have a pumpkin festival! That’s what Cherry Valley Farm in Pennsylvania do every year. You get to throw them, smash them with sledge hammers toss them at nail covered boards to get them to stick and most popular of all, you can get the farm team to drop them from their cherry picker high in the air.

Pumpkins thrown at nail board, see if you can make it stick.

Its fun for the whole family, kids especially love it although smashing pumpkins with plastic sledge hammers (for kids) its not an easy challenge. We gave it a miss. Throwing them like shot puts or against nail boards is easier and very entertaining. Watching pumpkins go splat, though that is something everyone enjoys.

Pumpkin field, pick one and get the crew to splat it.

The pumpkins get dropped onto a large concrete slab that the farm had put in specially. They have a field of pumpkins just behind this area and anyone can go find a pumpkin, bring it back, write a message on it if desired, then give it to the crew. They then core the pumpkins and fill them with water, so they make an even more impressive splat. Then they load up the cherry picker, raise it into the air and drop the things down to a great splat! It’s great entertainment.

Dropping pumpkins from cherry picker

A few years ago they got an even better idea. Why not get those giant pumpkins that are grown for competition and drop those. Lets face it there is not much you can do with a thousand pound pumpkin after its been entered into a competition so using it for a really entertaining splat is a wonderful idea. They usually have one or two of these giants. One is dropped in the middle of the festival and one as a finale. This year the first pumpkin was dropped onto a car the results were quite spectacular.

Giant pumpkin dropped on a car

This one I only got to see from the bridge in their corn maze as we were still working on the challenge of getting out of their excellent maze. We have been coming to Cherry valley for the maze for about 15 years now. The pumpkin festival is a lot younger than that. The giant pumpkin drop started about three years ago.

hoisting giant pumpkin up to get dropped.

This year the finale stared ‘Orange Crush’ a 1730 pound fruit, which is a pretty huge pumpkin. This monster was moved around with a forklift and then raised up under their cherry picker. Once again its full of water for an extra special splat – plus the seeds were removed first by the grower ready for next years crop. This guy is dropped remotely using a cable, no one wants to be that close to this guy when it does down. The event drew a large crowd, just like every year. Somehow there is nothing like watching something go splat!

Watch the giant pumpkin Orange Crush get splatted!


Sorry the video is sideways I cant figure out how to turn it around. if anyone has the answer I would be delighted to hear it.

The frost is coming!

Frantic last harvesting of tender plants is in full swing.

It’s always tempting to leave things until the last moment, especially these days when the climate is so unpredictable. Used to be that frost date meant frost date but now it could be weeks or even a month later than the normal frost prediction date. The frost date is taken as a averages of when the frost has appeared in the past, its not totally accurate but for most years its been pretty close. However with the constant climate changes these predictions are becoming more of a guess and frost dates can be way off. This year the first frost date for our area should have been October 15th but we had weather in the 80’s after that. Moving plants to a ‘warmer’ location at that time would have fried the poor little guys.

It’s the same with vegetables. On our farm peppers are still flowering right up until the frost every year. There is no point harvesting them, ‘just in case’ it could be weeks before the frost hits and a lot more peppers could be enjoyed. Same with other crops. So we leave them.
Then the frost warning comes through the national weather service and there is a mad scramble to get everything harvested before the frost hits. From experience we know what plants will survive a mild frost and those that wont. All the peppers need to be harvested, the semi tropical leaf plants like Manihot and roots of things like Jewels of Opar. It’s a lot of work and our cold storage is stuffed to overflowing by time we have finished.

floating_row_cover_beans
Floating row cover over green bean crop

Any crops that we still want to hold onto after the frost need to be covered in floating row fabric. This can either be draped directly over the row or made into a kind of tent structure if the plants are tall.
You can do this yourself in your garden if you have crops or plants that you want to protect. Many places sell floating row cover or if you only have one or two plants you can cover them individually with plastic shopping bags. Weigh them down with stones or other heavy objects so they don’t blow away in the wind. Once the frost has gone the bags can be removed. This is only supposed to be a temporary measure to keep the plant alive until you can do something with it. Or in the case of crops for a few weeks to either extend the length of the growing season or to protect crops that have not yet finished fruiting.

This year for us its green beans. We planted a late set of green beans because we ate so many of them this year, and we sold some too. We realized we would not have enough for the family through until next season so planted a late crop. These have not yet finished maturing so they will be protected until the beans are ready.
Every year we protect the Cape Gooseberries. These plants grow tall and always continue to flower right into the frost. There are a lot of fruits that wont mature but a lot that will if give a little more time. Next year I want to put up a hoop house over them and extend the season even further, but we don’t have time this year.

Of course this is just a mild or light frost or freeze, down to 32°F (0°C). It will kill tender plants but most of the hardier ones will be fine until we get a hard or killing frost that goes down to about 24°F ( °C). This will kill off everything. Long range weather forecast is not predicting this for at least another month, maybe more so we have time to harvest the rest of the leafy greens and the root vegetables and herbs before the ground freezes.

Knowing when your first frost date is in important to any gardener. If not it can be really disappointing to go outside and find all your tender plants wilted down and dead. Keeping and eye on the weather and listening for reports of frost is always important. Learn when the frost dates are for your area. The Farmers Almanac has a nice clickable map to help you out.