In the Northeast October is the month to plant your garlic. Usually I plant a little earlier in the month but this year has been so warm that I delayed it a little.
Garlic is like daffodils you plant it in the fall and harvest in the summer. The bulbs put down roots over the winter and create shoots in the spring. You don’t want to plant too early and have the bulbs create much in the way of shoots before the winter comes as they can get damaged by the cold weather and not perform as well in the spring. Last year this is what happened to my garlic. The weather was too warm right up until Christmas and the garlic grew too much. All my soft neck garlic was damaged and died in the winter snows. So plant as late as you can, but not too late that the ground is going to freeze and the plants don’t get time to establish. This used to be easy to do but with the constantly fluctuating weather theses days its more of difficult and luck than judgment.
The first thing to do is to prepare the bed where you want to plant your garlic. This article will cover that in detail the next will explain how to choose the right garlic and how to plant it.
We don’t grow garlic commercially yet, mainly because we are not set up for processing. We just grow for our own consumption, and eat everything that we grow.
DETERMINING WHERE TO PLANT YOUR GARLIC.
Location is important. It needs to have full sun especially in northern areas, in zones below 7b some afternoon shade is recommended to stop the tops scorching in the heat. Garlic needs a good rich soil to do well in so good bed preparation is very important. Adding a lot of organic material is essential for good garlic growth.
I will take you step by step through our garlic bed processing. For this you can adapt to suit your own personal plot of land. This bed preparation process can be used for any vegetable at any time.
1. Clear the bed.
Since garlic goes in so late it can easily follow a crop you already had in the vegetable garden. Its still a good idea to plan ahead as to where you intend to plant it so you know which crop to put there before the garlic crop. As with any crop don’t plant it in the same location for at least four years. Rotation is very important in vegetable gardening.
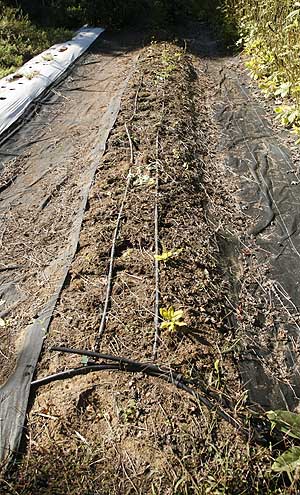
In our case we had second batch of yin yang beans in this location. These were grown for dried beans. The bed has just been cleared of beans down to the bare earth but still needs some work.

2. Removed the irrigation lines and then raked up all the debris and removed any weeds that were left after the initial cleanup.
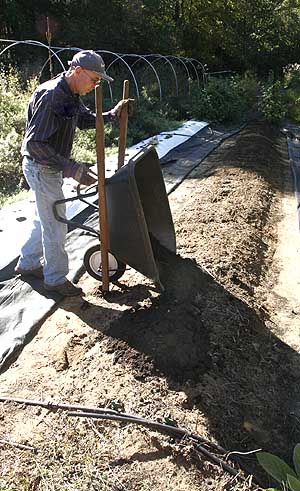
3. Add more compost! There can never be enough rich soil for garlic. So even though we had added compost to this row in the spring before we planted the beans we add more now for the garlic. This also helps to replenish anything that the beans took out of the soil during the summer months.
We use mushroom compost we get from a semi local mushroom farm. In our area its cheap and very effective.
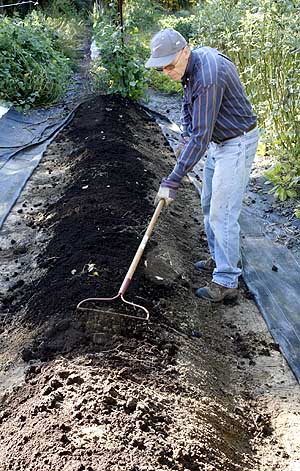
4. Rake the compost down along the row so that it is evenly distributed.
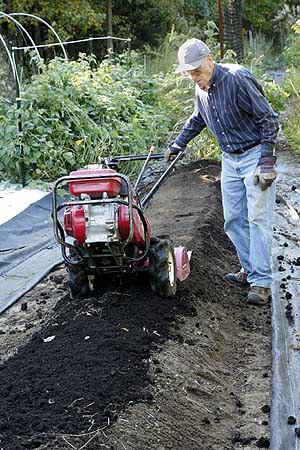
5. Rototill the compost into the row. This is a little tougher since rototillers are designed as a ‘walk behind’ machine but you really don’t want to walk on the bed that you have tilled. The soil needs to be as fluffy and aerated as possible. Never tread on the soil that you have tilled it defeats the object of tilling it. This is why we use beds three feet wide. That way we can work on the bed from both sides without ever treading on it. Some people say you can work a four foot, even six foot bed from both sides but I can’t. We experimented and decided that three feet is optimum for us.
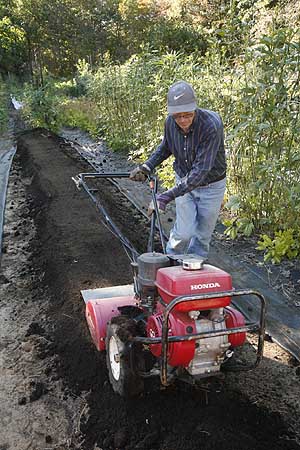
6. Walking beside the rototiller and getting it to work the bed is more challenging to hold it into place but its worth the effort. The tiller produces a nice flat top on the row and the only piece that needs ‘fixing’ is the start spot where the tiller was maneuvered into place.

7. The completed tilled row. A little tidying may be needed along the edges if any of the compost rolled off during the tilling process but for the most part its done. This stage can also be dug by hand especially if you only have a small section that you are working with. We often dig small sections or really narrow rows by hand but when we have a bed this long we now use the rototiller.
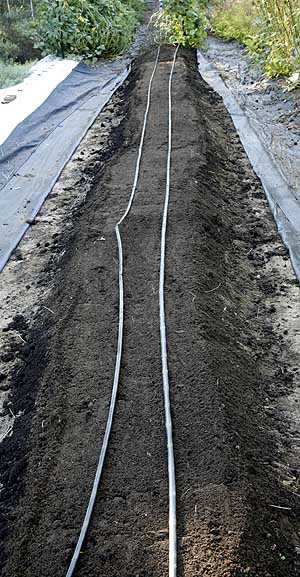
8. Replace or install irrigation lines. We use T-tape for all our irrigation. Its basically a drip tape with little emitters that slowly drip water onto the soil at specific intervals. We use 6 inch spaces, which is usually used for strawberry production but its perfect for garlic. Unfortunately this tape is only sold in large reels for commercial usage. However a soaker hose will work just as well and is ideal for a small garden. Lay your soaker hose out in lines down the rows.
9. Connecting up the irrigation lines – our case T-tape – to the water supply line. We have these running to all the rows in our fields. However its just as easy to connect up a soaker hose to a hosepipe or create your own irrigation system. Big box stores like Lowes and Home Depot sell connectors and pieces for you to create such irrigation systems if you desire. However they don’t sell T-tape.

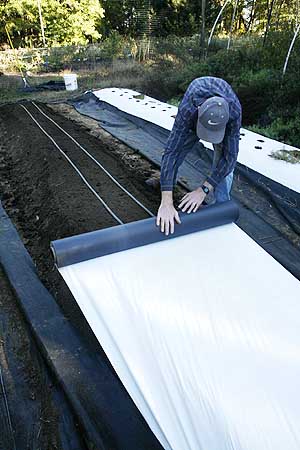
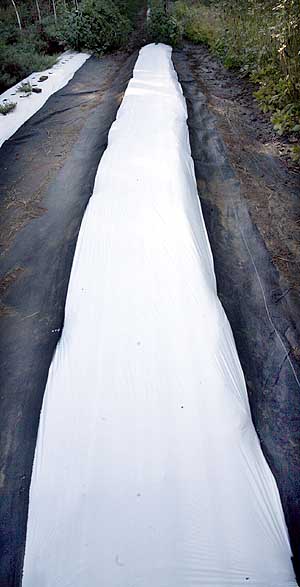
10. Laying the plastic mulch. We use plastic mulch on all our crops. This serves several purposes. First it keeps down the weeds. This is the major reason that almost all vegetable farmers use plastic mulch. Weeding is a massive problem and can be extremely costly, using mulch keeps the weeds down and thus the cost of weeding. You only get weeds in the holes that are made in the plastic. This can still mean a lot of weeds but its easer to control and rows do not get out of hand. Garlic does not beat out weeds and needs constant attention so mulching with something is important.
The other reasons for using mulch is that it keeps the ground moist, the soil does not dry out as fast and the plants are able to access available water more readily. We use white plastic because it helps to keep the soil cooler in the summer months. Black plastic can make the soil very hot.
Downside of plastic is that rain cannot easily reach the crops. They must be irrigated. However this is a small price to pay for weed suppression.
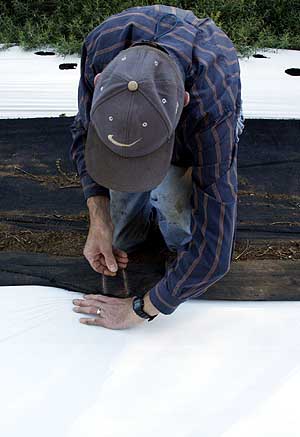
11. Staking down the plastic. While most commercial farms use a mulch laying machine and bed former this involves using a lot more land as the space between the rows must be mulch wider. We don’t have enough land to do this and we could not afford such a machine either. Thus we lay all our plastic by hand. These machines bury the edges of the plastic in the soil. We use ground fabric to keep the weeds down between the rows and stake it thorough the plastic to keep both in place. This works every effectively in most cases.
Mulching your plants.
Plastic mulch only comes in large rolls for commercial use, However there are several options available in garden centers for mulching around plants. For small areas you can also use a layer of leaves mixed with grass cuttings. Don’t use just grass cuttings they tend to mat and attract molds. Newspaper and other materials are also good mulch materials. If you are using a organic mulch such as leaves chopping them a little first is recommended so that they stay in place. Make sure that they layer is at least 2 inches thick or it will not suppress weeds.
The ideal mulch is a layer of leaves with a layer of grass cuttings on the top. The leaves are excellent mulch but can blow away in the wind. The grass cuttings spread to about ½ inch keeps the leaves in place by forming a mat. You need only enough grass cuttings to form a thin layer over the leaves or other material to keep it in place.
Don’t make the layer too thick or it forms a dense mat that will repel water and can encourage molds to form. It is easier to put the mulch down first, the pull small holes in the mulch where you are going to plant your garlic, or whatever else you choose to plant. If mulch is put in place after the garlic bulbs are planted it is often quite difficult to determine exactly where the bulbs are and where the spaces in the mulch should be.
Newspaper can also be used as a mulch but it is not recommended that you use pages with color as the dyes in the inks could be toxic to the soil.
Happy Gardening!